
In this quick tutorial, you will learn how to fold a simple origami angelfish!
These little paper fish can be used to complement any water or aquarium theme or as a quick and quirky gift. This easy fold can be done in 3-5 minutes.
Let’s get folding!
In this guide, we used square origami paper with the same color on both sides, but the multi-colored paper is fine.
1. Fold the paper in half diagonally and unfold
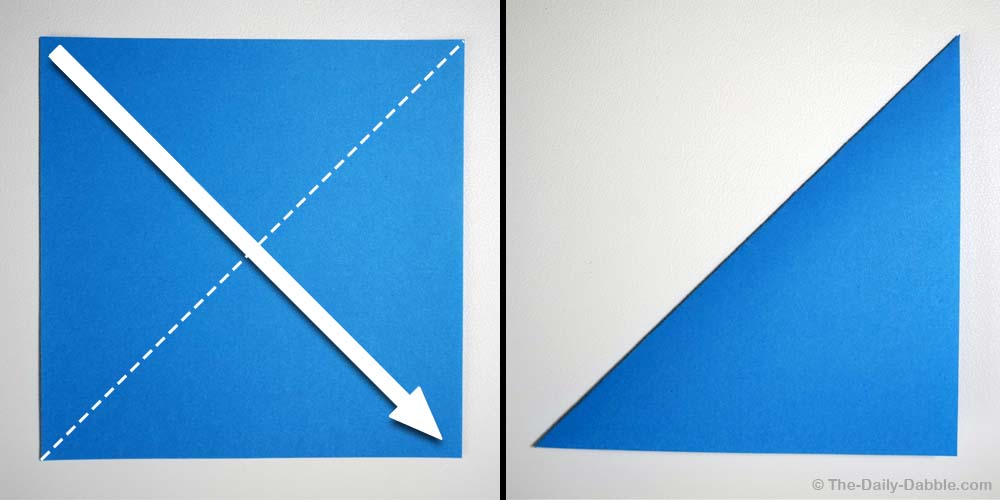
Begin by folding the paper in half diagonally and then unfold, leaving behind a diagonal crease.
2. Fold the paper in half diagonally in the opposite direction and unfold
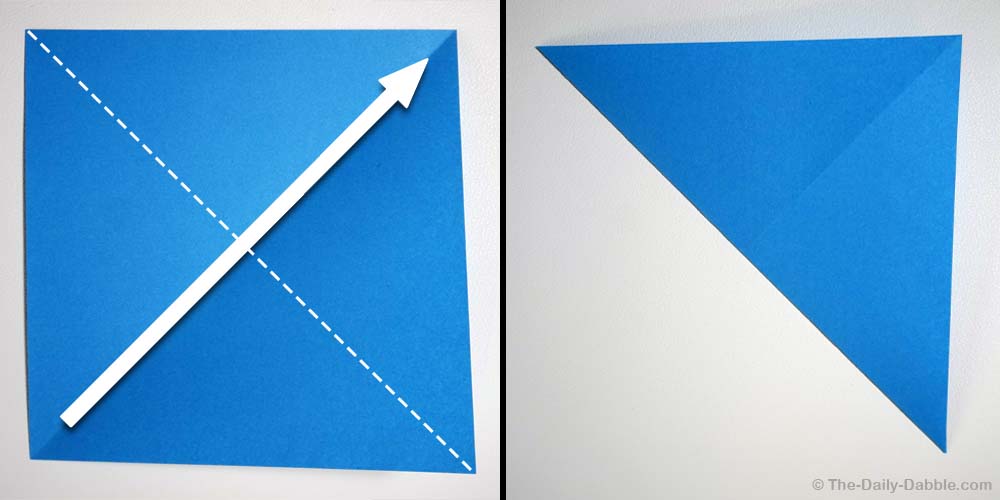
Once again fold the paper in half diagonally in the opposite direction and then unfold, leaving behind another diagonal crease.
3. Fold the paper in half and unfold

Next, fold your paper in half by bringing the right edge over to the left edge. After making the crease, unfold the paper once more.
4. Fold the paper in half in the opposite direction and unfold

Once again, fold the paper in half by bringing the top edge down to the bottom edge. After making the crease, unfold the paper once more.
5. Fold the right edge into the top edge
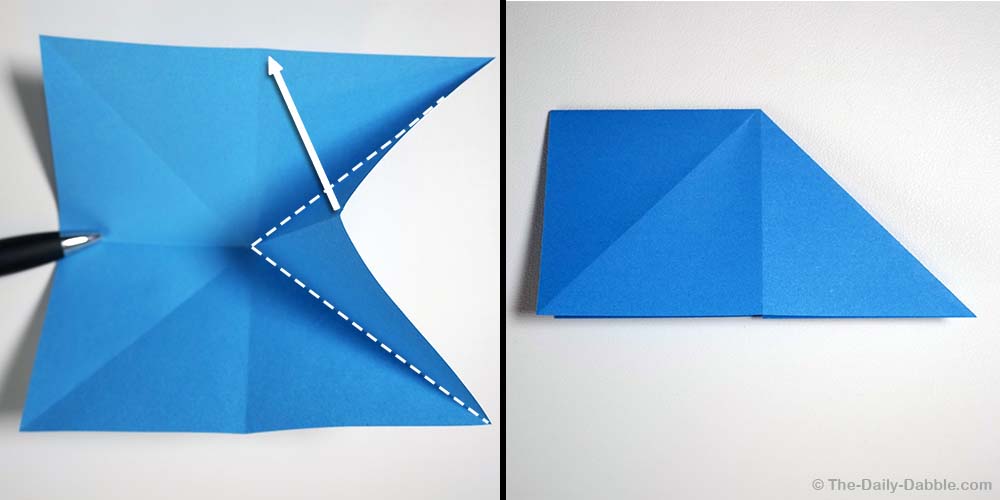
Tuck the right edge in by grabbing the center of the right edge and folding it up to the center of the top edge. The paper will naturally fold in half with the right side tucked inside.
6. Repeat the previous step on the other side
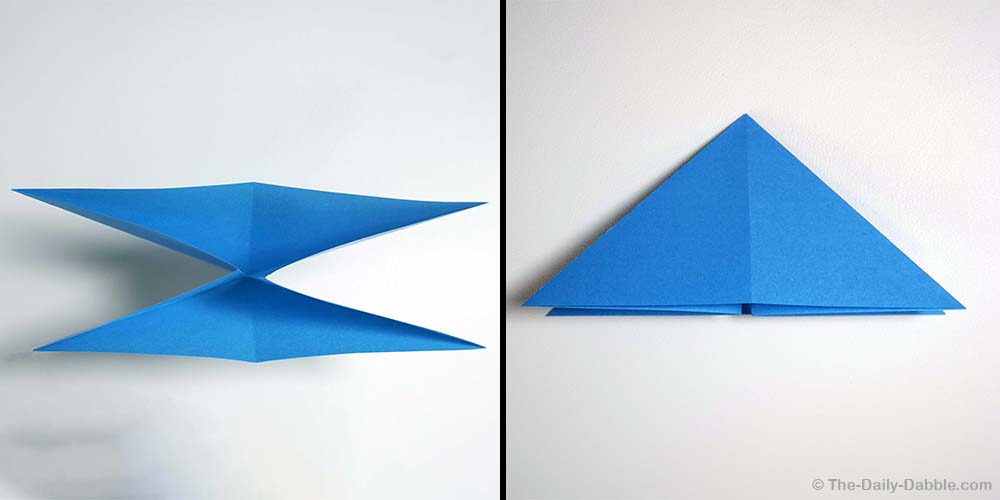
Next, repeat the same thing on the opposite side. Take the center of the left edge and fold it up to the center of the top edge.
Origami 101: This triangle-like fold is called the waterbomb base and can be used to fold a variety of other origami creations!
7. Fold the top edge down to the middle crease
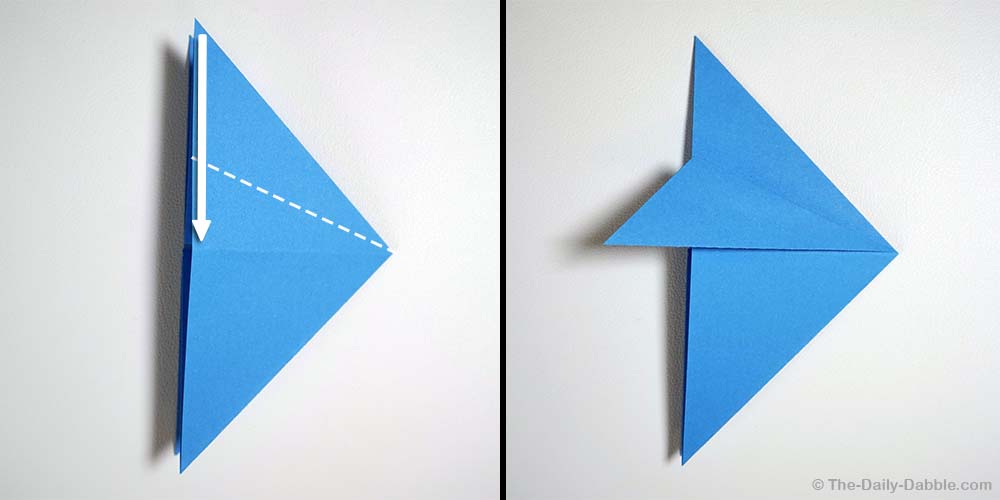
Now, we’re going to start creating the fish’s fin! Rotate your paper so that the two bottom corners are on the left and then grab the upper flap of the top edge and fold it to meet the middle crease.
8. Fold to the middle crease once more and unfold
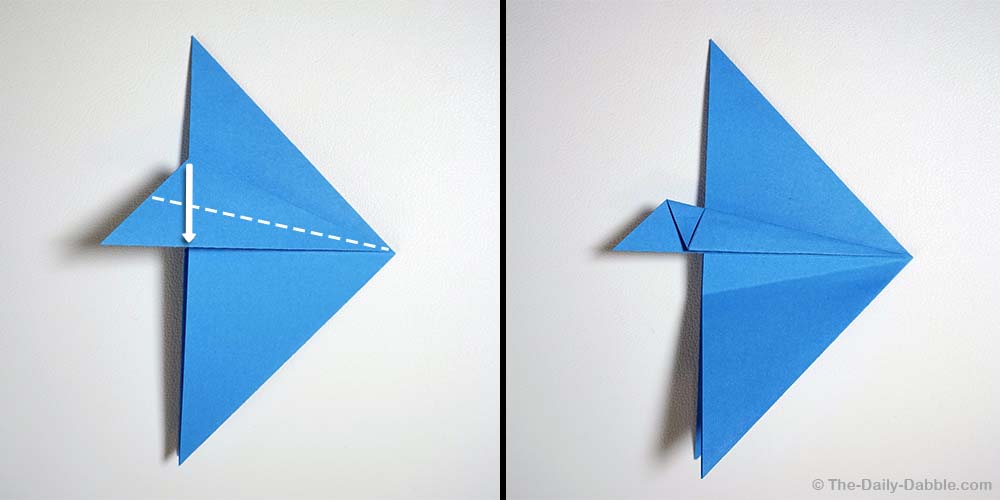
Grab the top edge of your recent fold and once again fold it to the middle crease. Then unfold the last two folds until you again have a triangle.
9. Fold the bottom edge to the second from the middle crease

Next, fold the upper flap of the bottom edge up towards the crease above your center crease (or the third crease down).
10. Fold the top flap back over the bottom flap
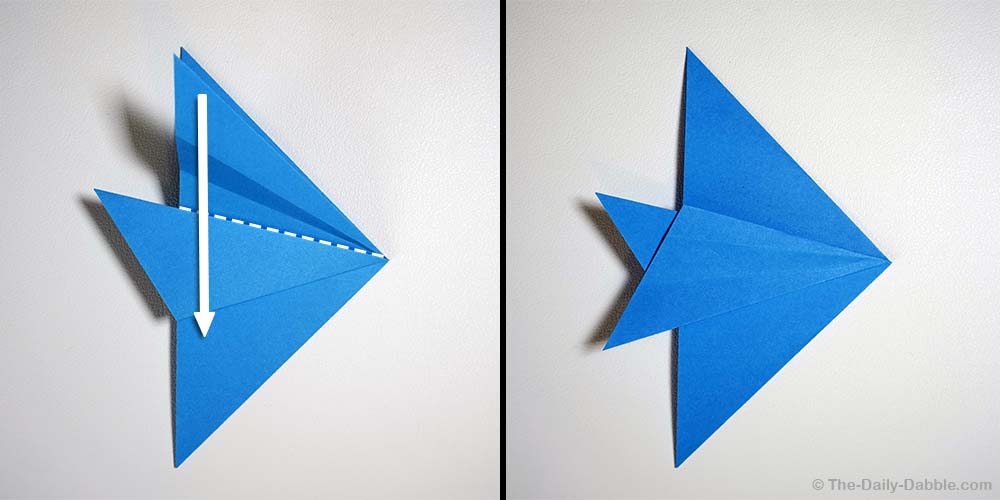
To finish off your origami fish, fold the top flap back down and cover the bottom flap.
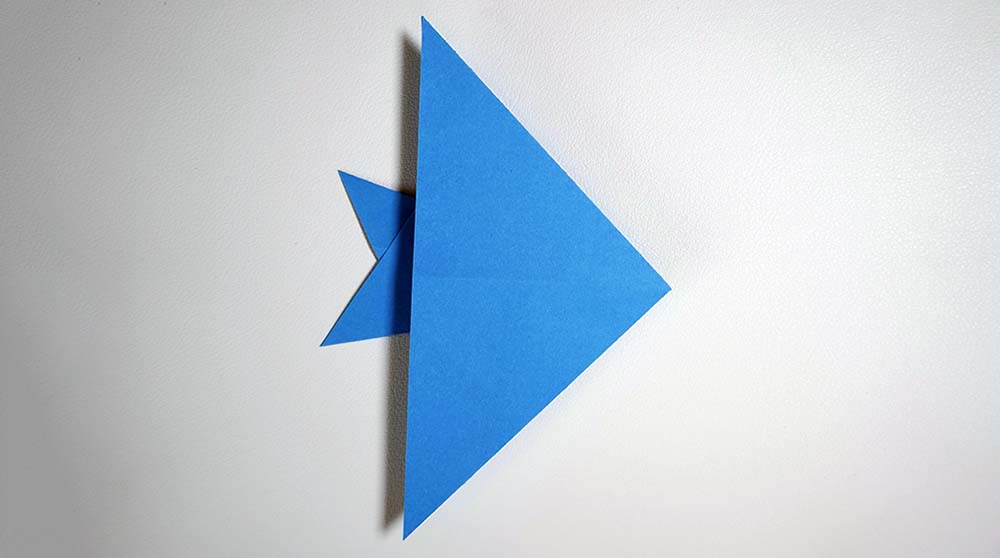
Then flip your paper over and there you have it, an easy origami fish!
If you liked this little paper fish, consider checking out our guide to making a fish out of a dollar bill!
We also have another easy origami fish design that takes about the same amount of time to fold as this one.
Happy Folding!