
In this folding tutorial, I will cover how to fold an easy origami pyramid.
This origami project can be completed in about 5 minutes and is beginner-friendly.
The design has simple folds that are repeated and requires a little glue at the end.
Let’s Make an Origami Pyramid!
To make this paper pyramid, you will need a piece of square origami paper and some glue to hold it together.
My paper is the same color on both sides, but multicolored paper works just the same.
You can use regular printer paper cut into a square if you need a square sheet.
Gift Idea: Put a message or some money inside before you glue it and gift it to someone as a surprise!
STEP 1. Fold the paper in half, both ways
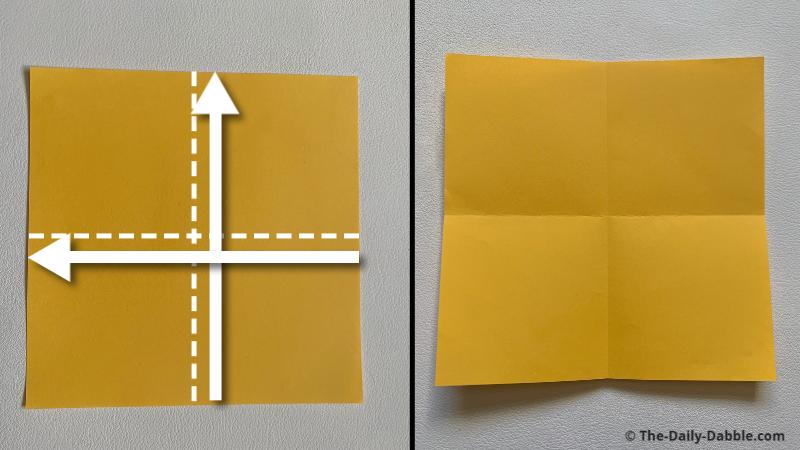
Fold the paper in half from edge to edge and then unfold.
Fold it in half one more time from the opposite edges.
After unfolding the second time, you should now have two crossing creases.
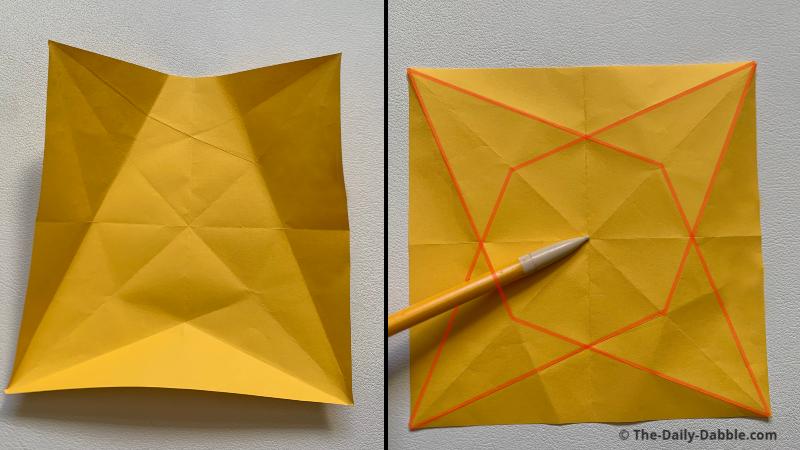
STEP 2. Fold the paper in half twice more diagonally
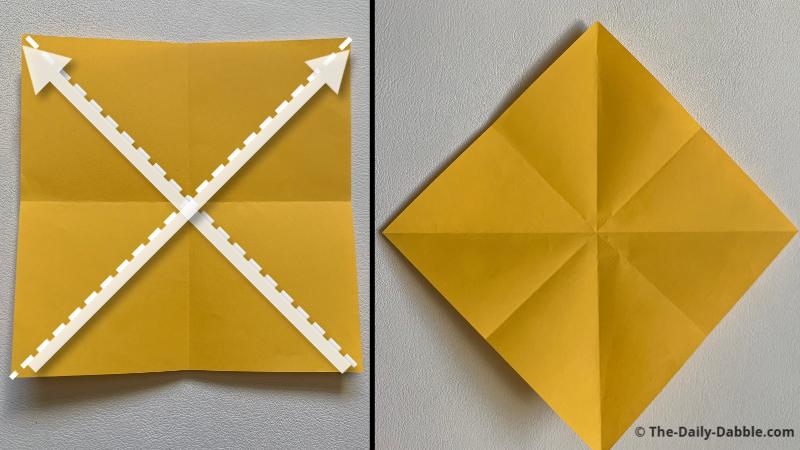
Fold the paper in half two more times from point to point.
You should now have a total of four crease lines, as shown in the picture.
STEP 3. Bring one edge to the center and partially crease
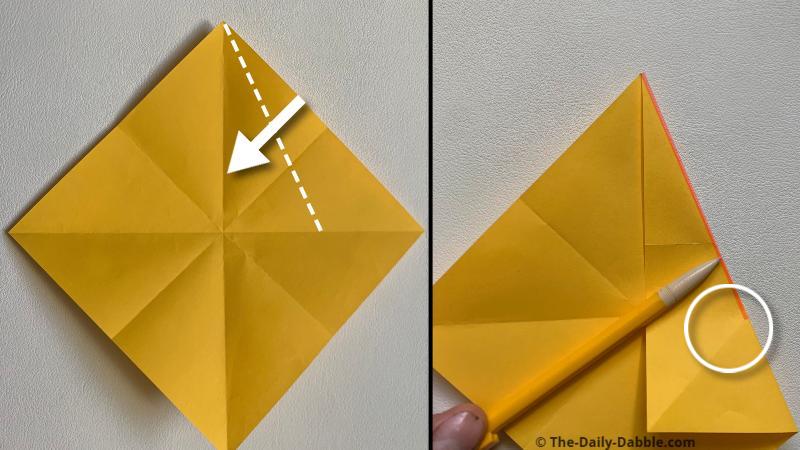
Choose one edge and bring it to match a straight center crease line.
Crease about three-fourths of the way along the edge, as shown in red.
You will crease all the way to the diagonal crease line shown in the white circle.
STEP 4. Repeat this fold with the next edge over
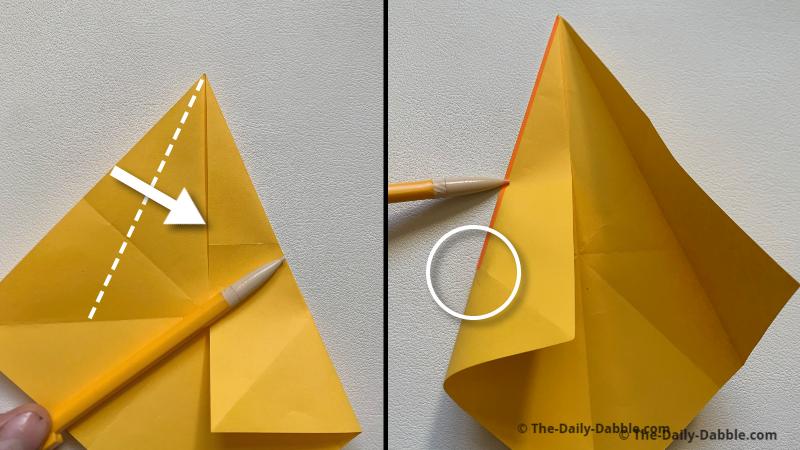
I folded the right edge to the center, so now let’s do the left.
Repeat the same creasing process to the diagonal crease shown in the white circle.
STEP 5. Repeat these folds for each corner of the paper
In steps 3-4, we took care of one corner, so we just need to do the same thing for the other three corners.
Make the two folds on each corner to end up with the creases shown on the right.
STEP 6. Fold a corner across to make a crease
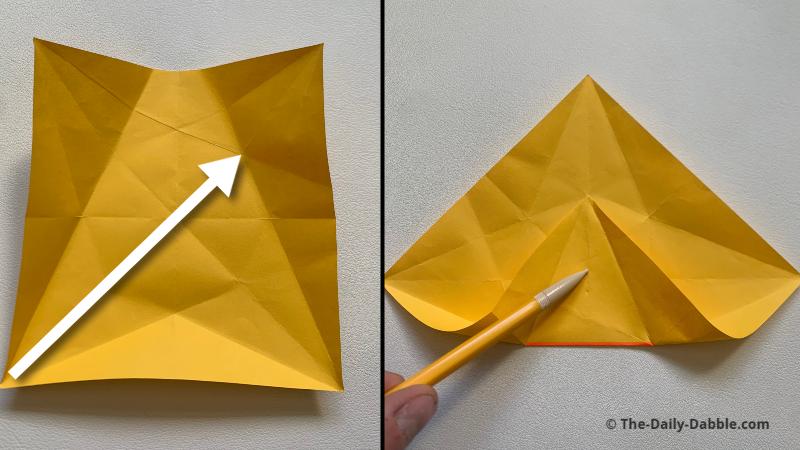
Fold a corner to where the diagonal creases make an “x” and then crease the portion shown.
As shown in red, we are making a crease only on the middle portion.
STEP 7. Repeat the fold for the other three corners

Repeat the fold in step 6 for the other three corners.
These three folds, added to the last one, make a total of four creases that form the base of the pyramid.
STEP 8. Form the 3d pyramid and glue the edges together
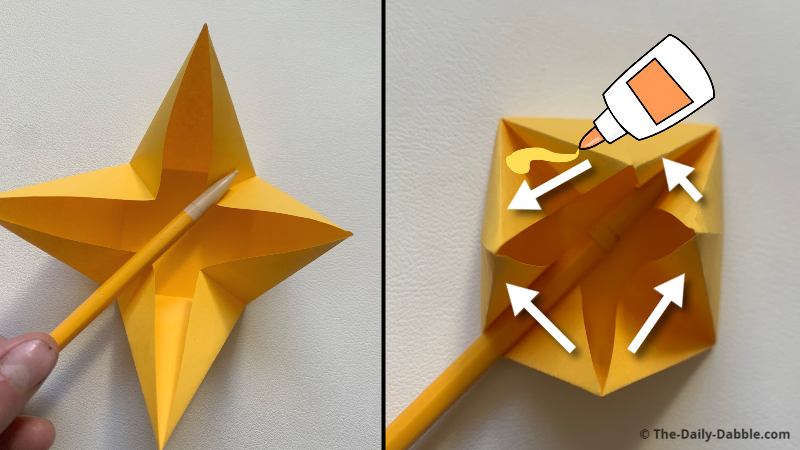
Now that you have formed the base creases, you can use the creases to start to form the pyramid.
Once you have made the basic four-point star, you can glue the edges and push them together.
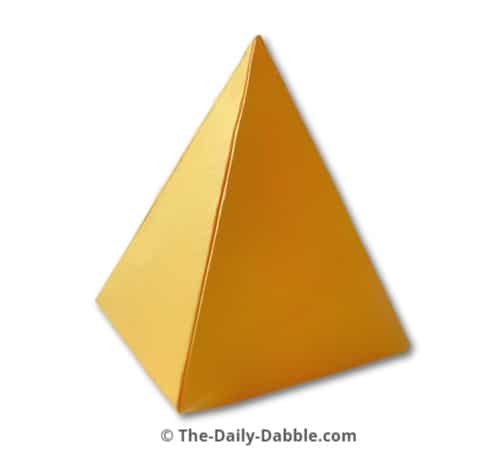
Now you know how to make a paper pyramid! Once it dries, you can decorate it how you want.
Want some more awesome origami design instructions?
We also have a guide for folding a dollar bill into a pyramid, or you can check out another similar design, like the origami box.
Happy Folding!