This is a 10-step folding guide for an easy origami 3D heart that is inflatable and fun to make!
There are not any difficult folds, and this is a beginner-level design. The only somewhat challenging part is shaping it after you inflate it.
If you want to make a regular heart instead, visit our origami heart tutorial.
Let’s get folding!
Using thinner paper will make it easier to inflate, but I simply used regular square origami paper with the same color on both sides.
If you don’t have any origami paper, here’s how to make regular paper square for origami.
1. Fold the paper in half from side to side
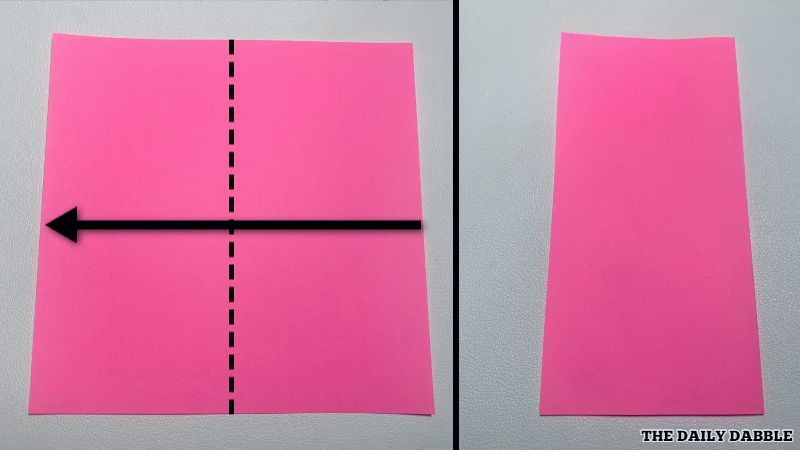
Start by folding the paper in half from the right to left.
Match the edges evenly and rub all the creases made throughout with your nail to ensure it stays nice.
2. Fold a little section evenly up
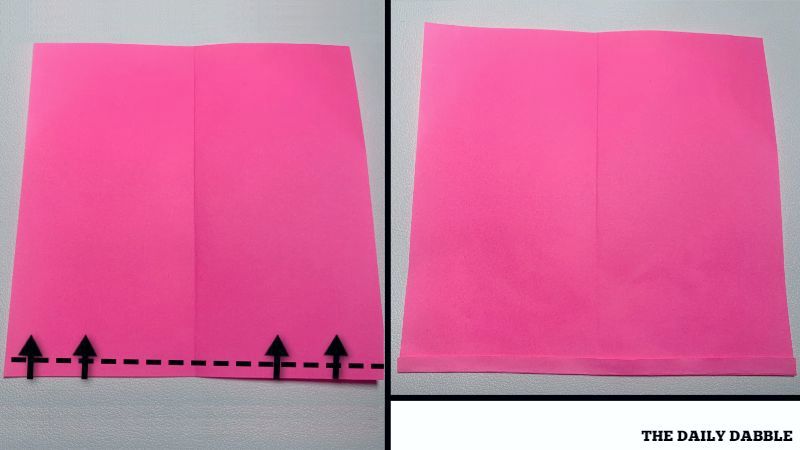
Bring just a little section up evenly all the way across from the bottom.
Roll the bottom slowly to help make it all even before making the crease.
3. Fold it in half evenly from bottom to top
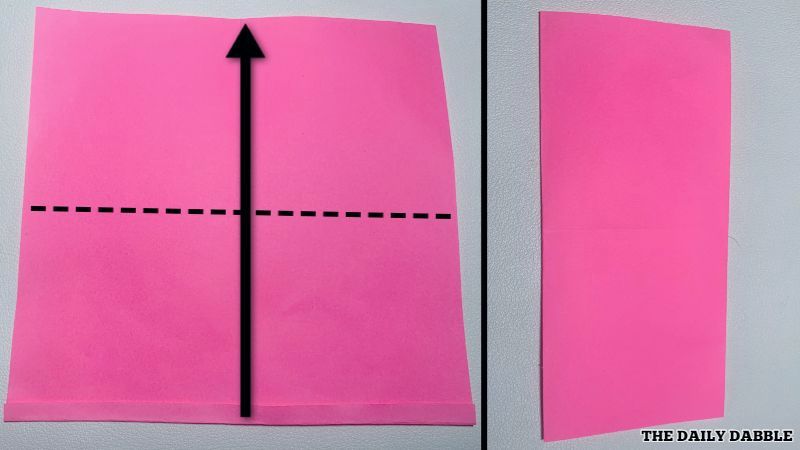
Bring the bottom edge to match the top evenly.
Rotate the paper so the open flaps are on the right.
4. Fold the square in half diagonally
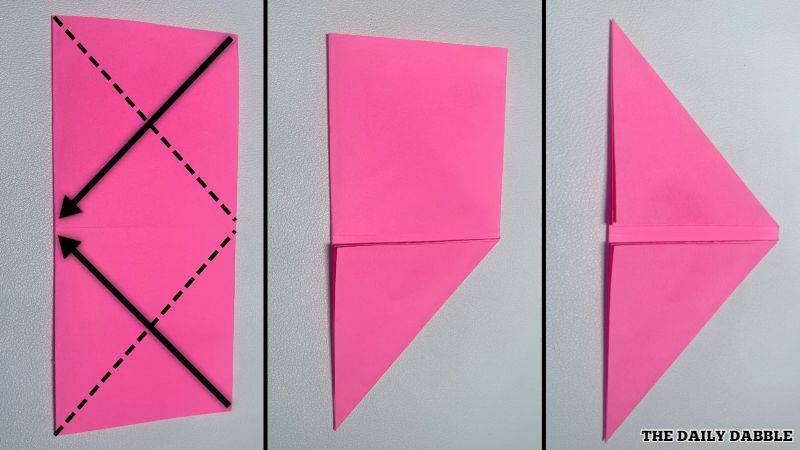
Bring the outer edges to meet the bottom closed side edge.
There will be a slight gap in the center between the flaps as shown.
5. Fold the top open flaps diagonally to the top edges
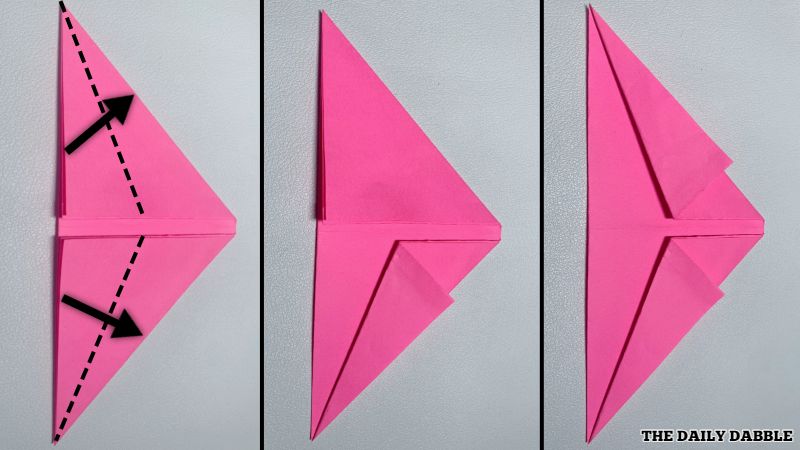
Make even folds on both sides with the two top open layers.
Crease the edges well by pressing them hard.
Open these folds back up for the next step.
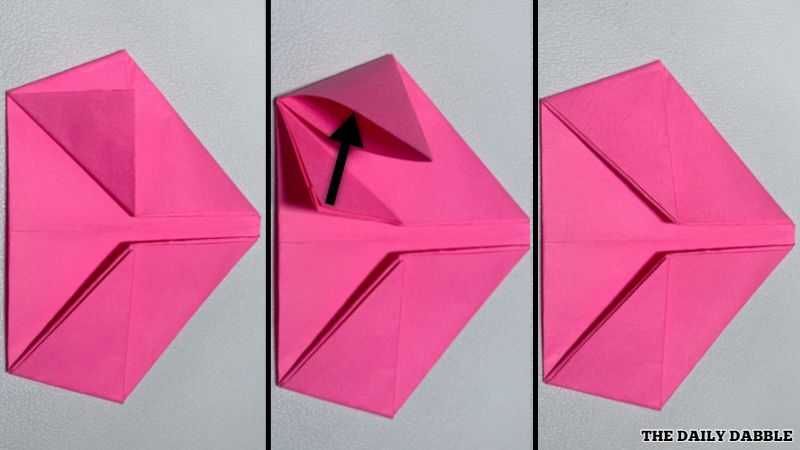
6. Make two diagonal folds on one side
Take the top layer of one of the two bottom points to its center edge diagonally.
Next, bring the lower layer evenly over it.
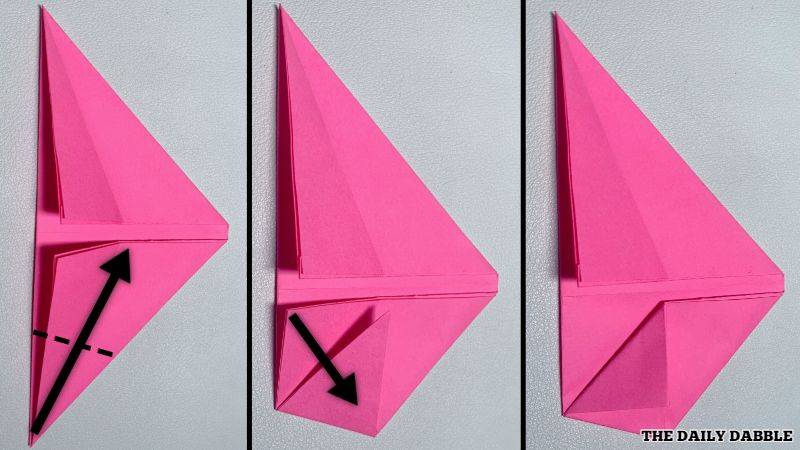
7. Open the right flap and put the left one inside
Open up both previous folds and then widen the right one into a pocket.
Tightly tuck the whole left flap inside the right one as evenly as you can.
8. Repeat this process on the other half
Follow the same process of steps 6 and 7 the same way on the opposite tip.
Remember to press down on all of the edges to keep everything nice and tight.
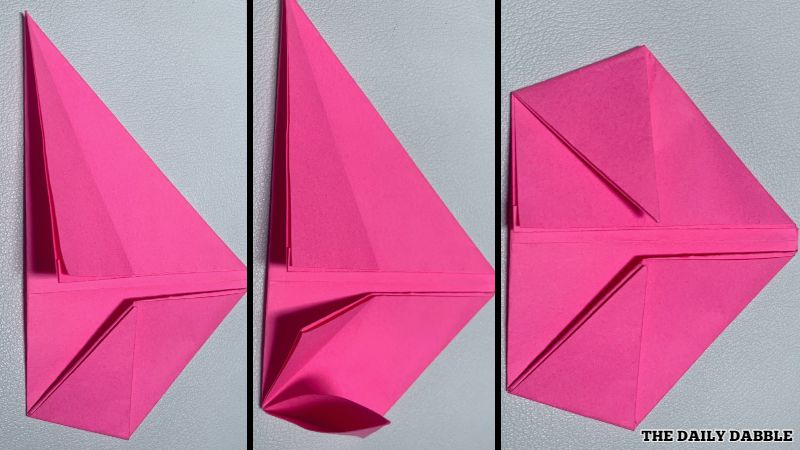
9. Make the last shaping folds on the back
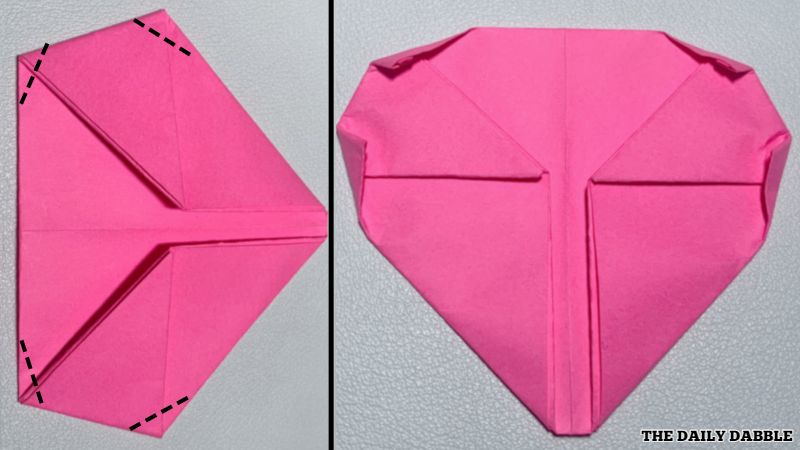
Make four shaping folds to finish up the heart.
Look at the front while you make this to ensure it is taking shape how you want.
Think about not making the creases hard so you can reshape them later if needed.
10. Inflate and shape the heart
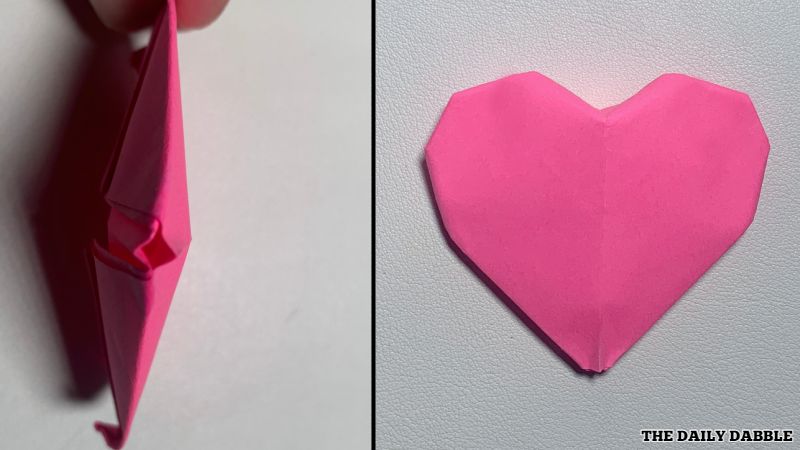 Open the bottom hole slightly and blow firmly to inflate the heart.
Shape it by pressing the top middle down and readjust the edges as you like.
When you are having trouble shaping it, you can loosen the back shaping fold to let it expand even more.
If you liked this design, I recommend folding the origami balloon next! It is inflated using the same folding techniques.
Happy Folding!