
With these folding instructions, you can learn to make your own origami mushroom.
The mushroom design in this guide isn’t too tough for beginners and can be made by most in about 5 minutes.
This is just one of the hundreds of easy paper-folding ideas you can find in our origami collection.
Let’s get folding!
To make a paper mushroom, you will need a single square sheet of paper. You can use regular printer paper cut into a square if you need to, but origami paper makes it look better!
I’ll use a multi-color 6 x 6 sheet of origami paper in this guide, but single-colored paper works fine if you don’t want dual colors.
Whatever colored side you start folding on will be the color of the top of the mushroom.
1. Fold the paper in half diagonally
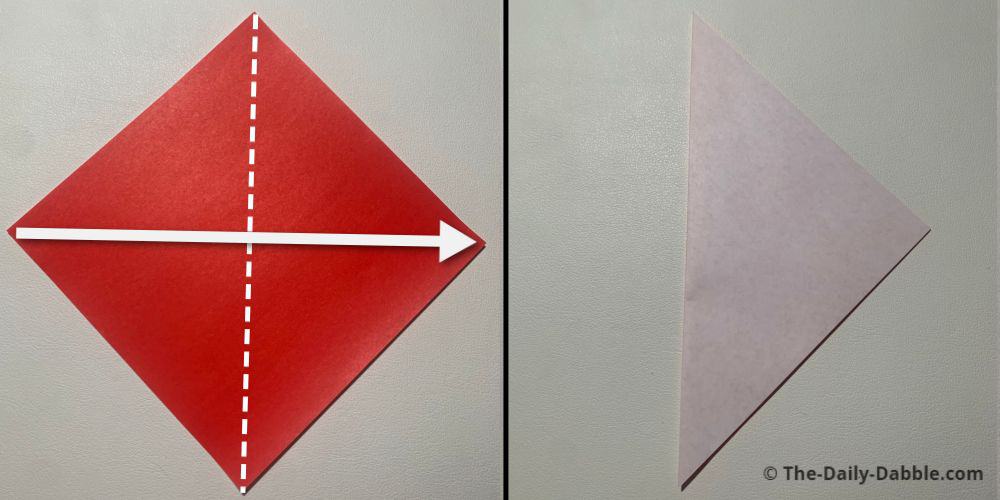
Fold the paper in half from point to point diagonally and then unfold.
2. Fold both lower edges to the center vertical crease
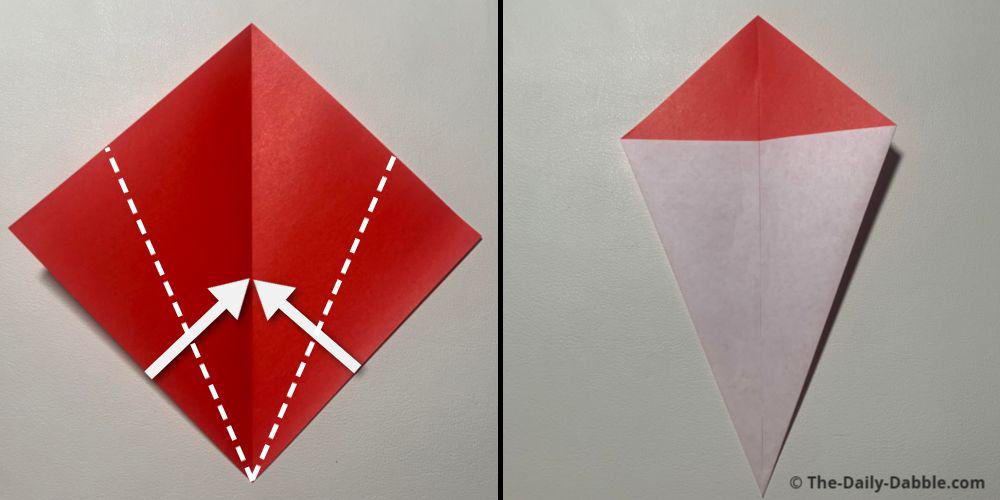
Take the lower edges of the square and fold them to meet evenly at the center crease.
Make sure the edges are creased well, and then move to the next step.
3. Fold the top triangle part over and behind
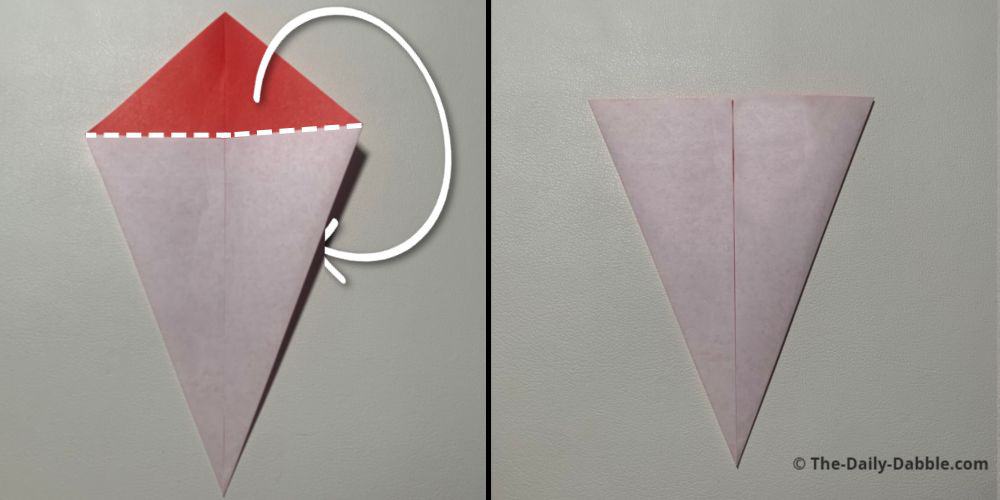
Take the top triangular section and fold it over evenly to the other side.
4. Bring the bottom up over about an inch portion of the top

While holding the top edge with a finger, bring the bottom point all the way up.
Crease this section over about a 3/4 inch to 1-inch section, as shown.
5. Make two diagonal folds on the lower middle edges
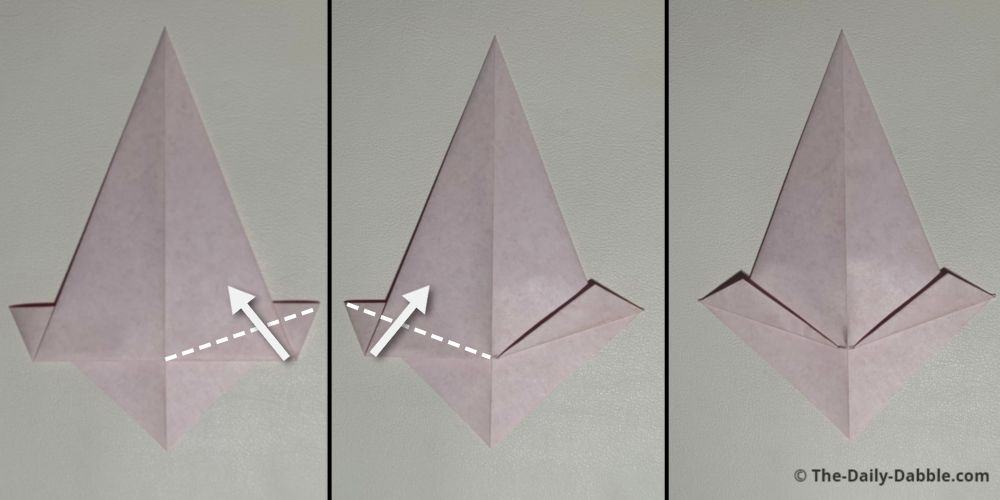
Bring the lower right closed edge of the little section in half diagonally as shown.
Repeat the same diagonal fold on the left side to mirror the right.
Crease the edges of these folds you make, and then move on to the next step.
6. Unfold the right fold just made and bring it to the middle
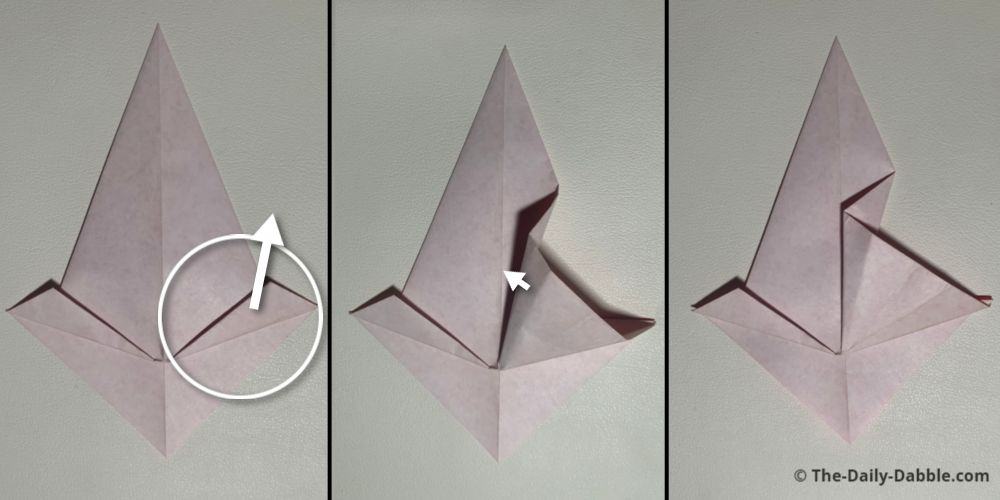
Unfold the lower right diagonal fold that was made in the last step.
Once unfolded, manipulate it until you can get it down flat with the inner edge matched to the centerline.
7. Repeat the same process for the left side

Unfold the lower-left diagonal fold and maneuver it until you can get it to go down flat and mirror the right side.
8. Finish Shaping the mushroom
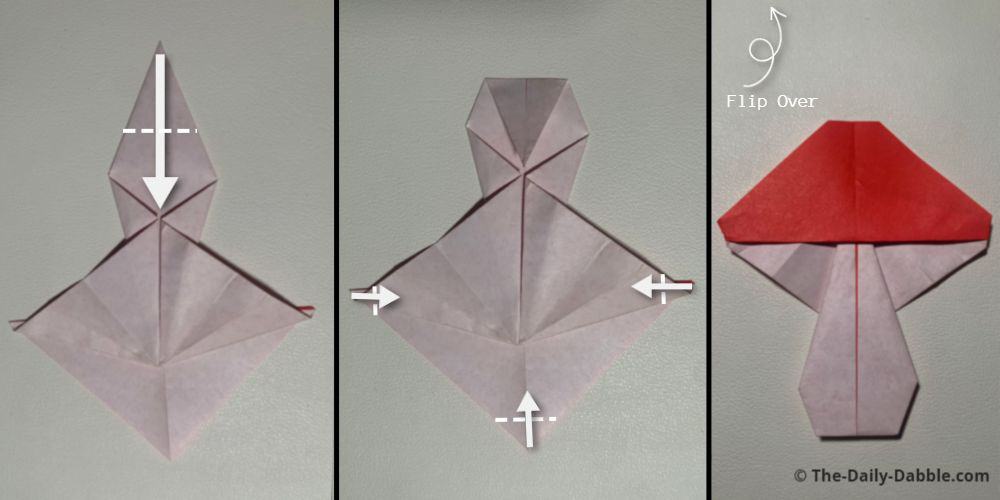
Fold the stem tip to meet the diagonal fold edges and then slightly fold in the three other tips.
You can also pull back on the middle white part to hods some of it behind the stem and give it more of a 3D look.
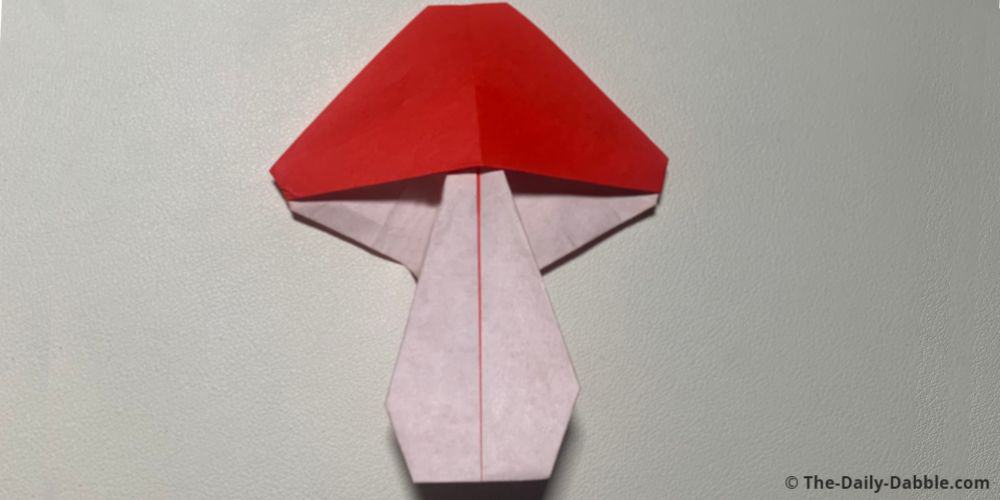
Now you know how to make a neat little paper mushroom!
We have plenty of more easy origami folding tutorials for you to make to go along with this design, like the paper fly or paper grass!
Happy Folding!