Follow this guide to learn how to fold a dollar bill origami letter G.
The letter G is doable for beginners as it is mostly the same types of folds repeated.
You can find guides for all the letters in our money origami alphabet guide!
Let’s get started!
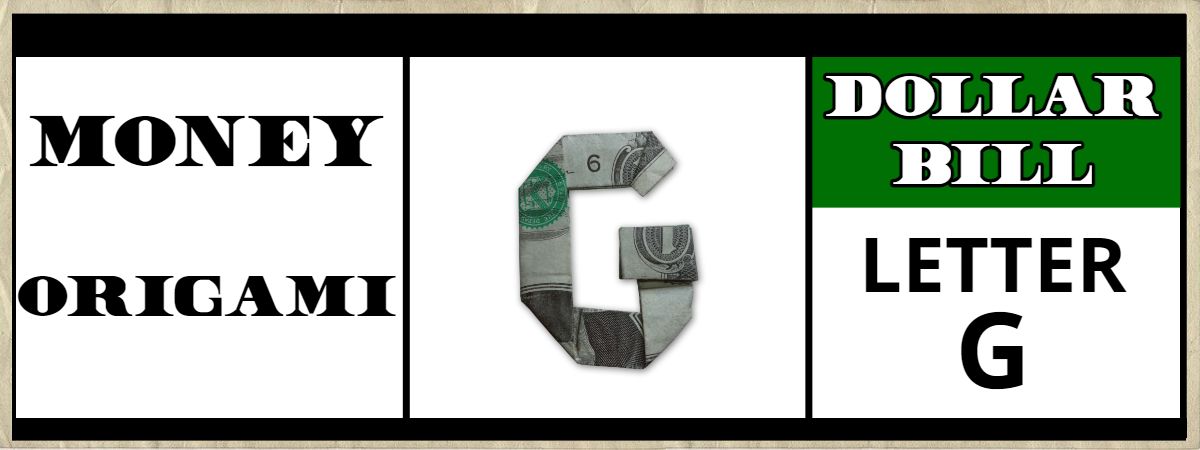
STEP 1: Fold the bill in half lengthwise
We will start on the folding on the backside.
Fold directly in middle lengthwise from top to bottom.
Rub the edge to make a nice crease and then unfold it.
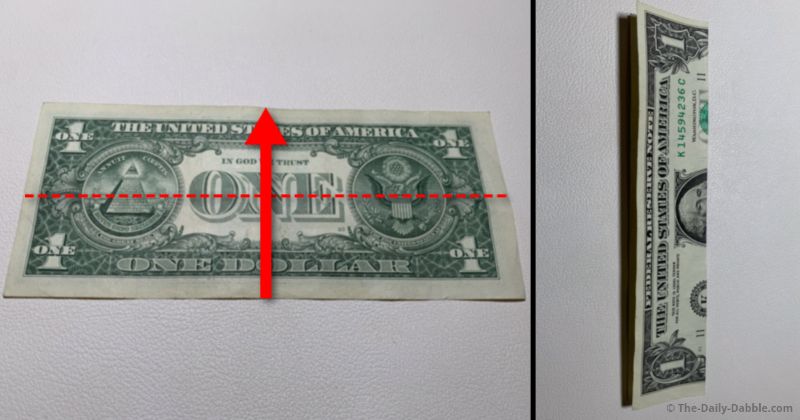
STEP 2: Make two lengthwise folds to the center
We will fold the bill into one skinny piece in the next two steps.
Start by dividing the bottom half into thirds.
Using the pictures as a guide to keep everything even, make two folds to the center.
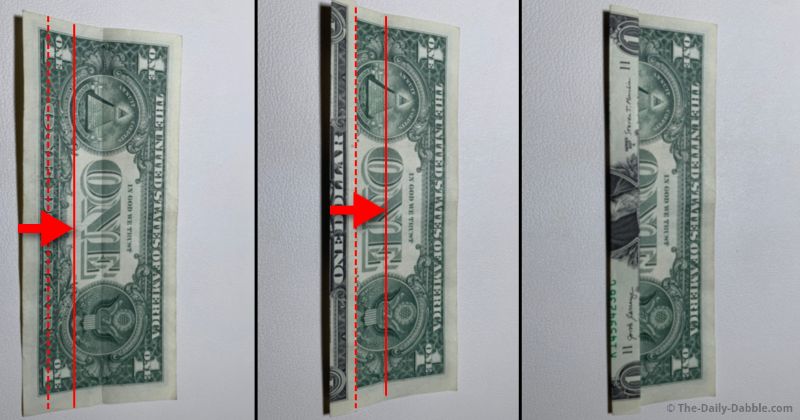
STEP 3: Get the bill into one-sixth
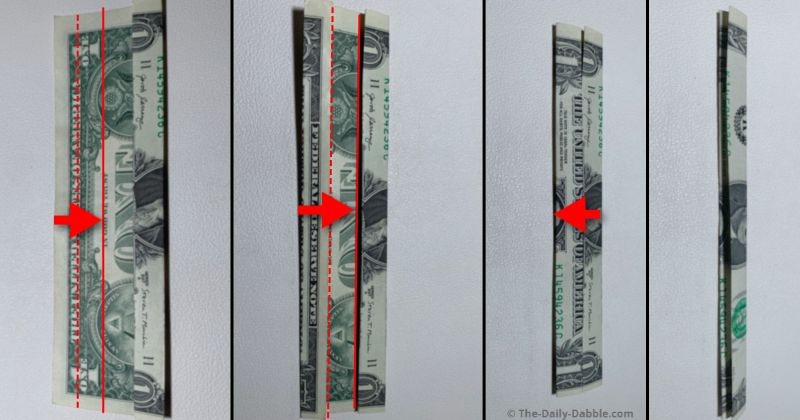
Repeat the same steps for the top half to get it evenly to the center.
Fold the last two sections over each other to flatten.
Open this last fold over to the side with George Washington’s face.
STEP 4: Make a valley fold with two creases
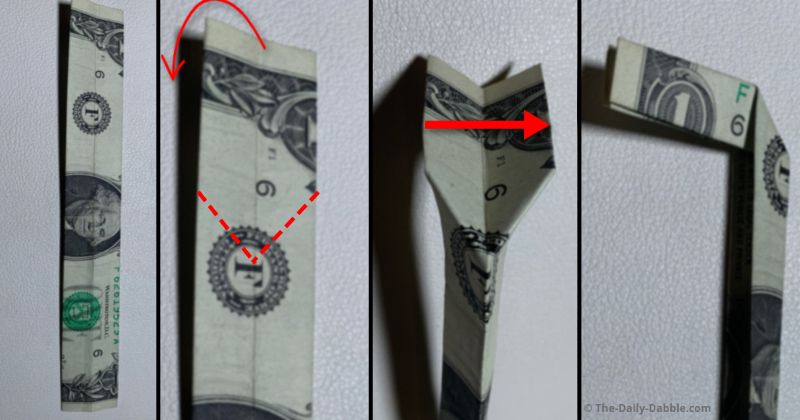
On the left end, make two creases where shown by pinching the middle and pushing in the end.
Fold the edge underneath into the middle portion and then flatten.
Be sure to rub the edges of edges crease when they are made to keep everything flat.
STEP 5: Open the end and then fold it over
Open the previous fold back up and bring the end over towards the middle.
Next, flatten it against the longer skinny pice the best you can for now.
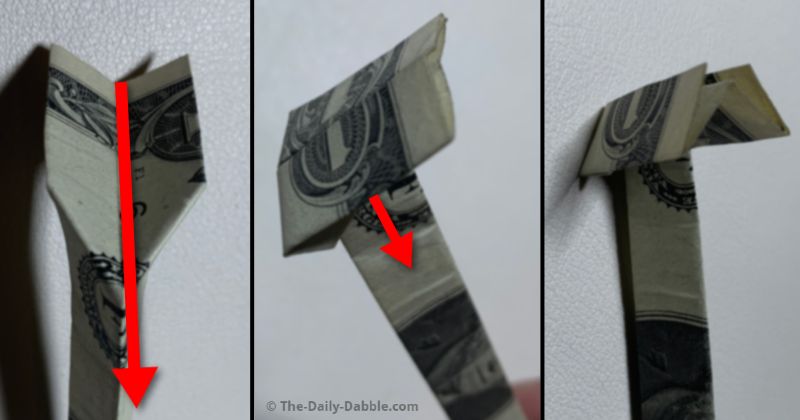
STEP 6: Make creases the opposite way of step 4
Form two creases like in step four but facing the opposite way diagonally.
Lastly, flatten out the bill once more and press all the edges.
STEP 7: Make two creases the opposite way
Now that you are surely an expert on these types of folds, we’ll make two more.
These will be facing the opposite direction as the last.
When they are made, close everything up to flatten the bill again.
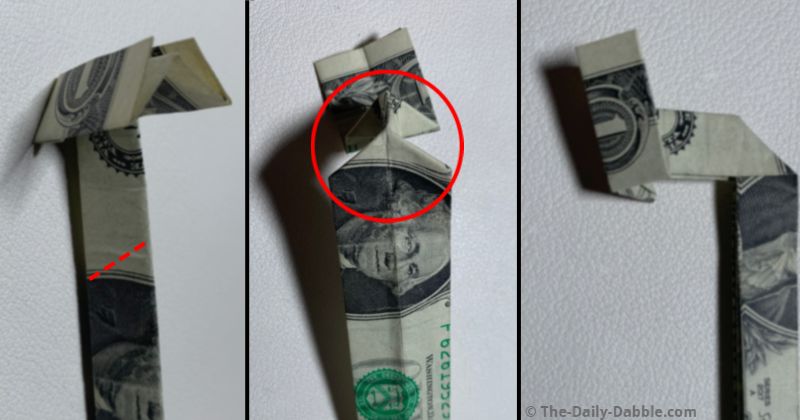
STEP 8: Make two more similar folds

The first pair of creases will face the opposite of the previous.
Press the section close to the middle in to flatten it a bit.
The second pair of creases won’t be at as much of an angle.
Fold these last flaps under and close the bill up once more.
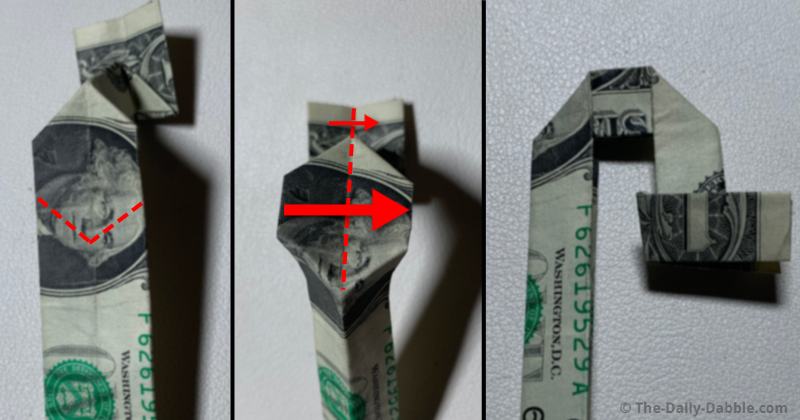
STEP 9: Finish the letter with some shaping
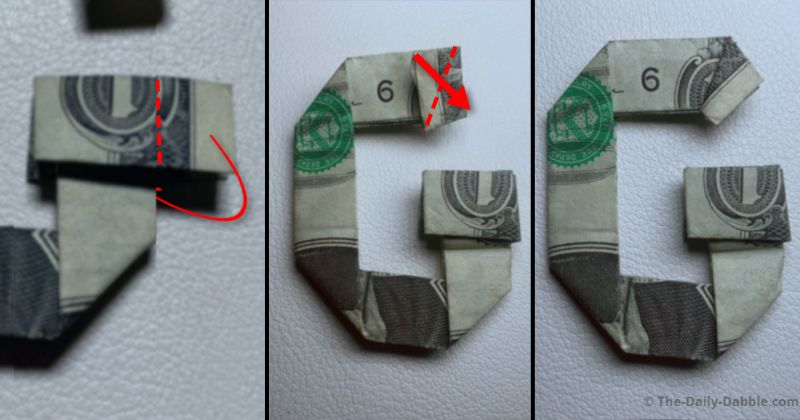
Fold the lower flap over to the right and back under nice and tight.
Lastly, make one diagonal fold on the top right tip to finish shaping.
Even things up to your liking and place the letter under something heavy for a while to help it keep it’s shape.
Now you know how to make a money origami letter G!
PREVIOUS: Dollar Bill Origami Letter F
NEXT: Dollar Bill Origami Letter H
FOLD SOMETHING ELSE: 30+ Dollar Bill Origami Designs
Happy Folding!