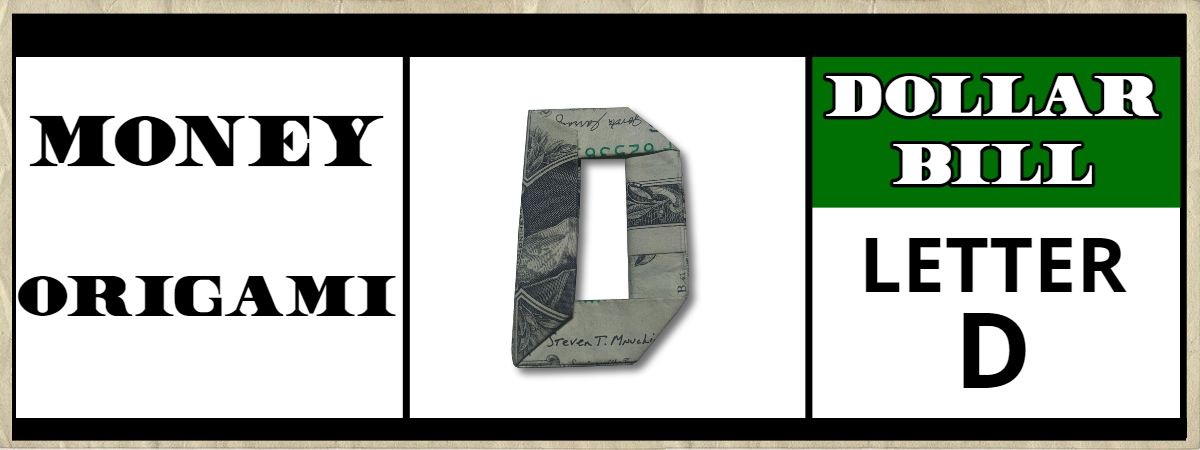
This guide has step-by-step instructions to help you fold a dollar bill origami letter D.
Folding this letter is relatively easy and should be doable in about five minutes
You can find all our letters and more designs in our collection of money origami folding guides.
Let’s get started!
STEP 1: Fold the bill in half lengthwise
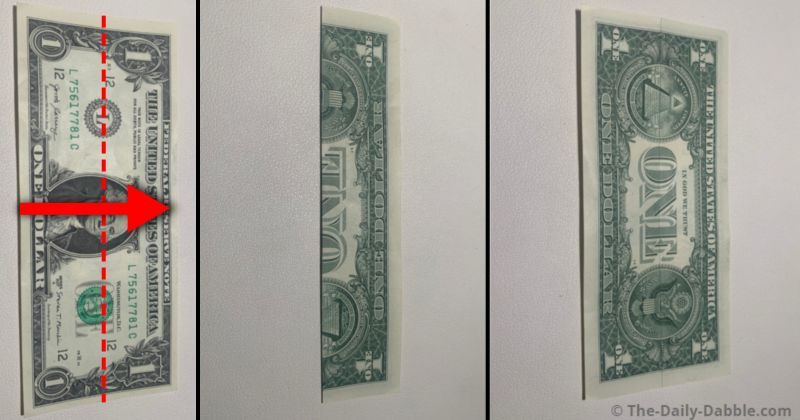
Fold the dollar bill in half lengthwise, press the center crease well, and then unfold it.
The next step will begin on the back side of the bill.
STEP 2: Fold one half into thirds
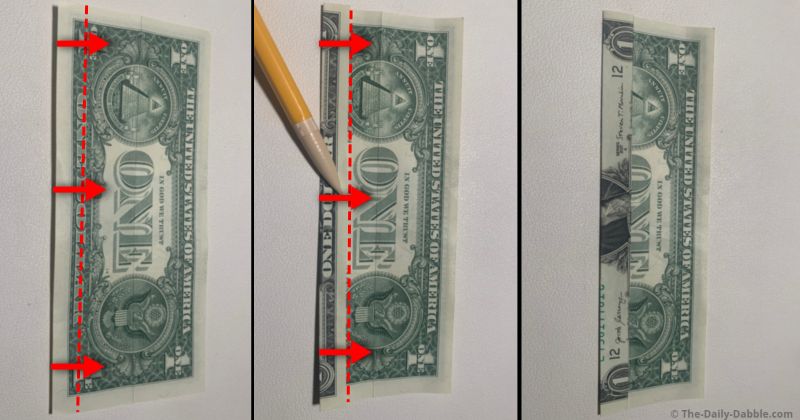
Starting on the lower side, we will make two even folds to the center crease.
The first fold will cover just a bit of the circles on either side containing the eagle and the pyramid.
After that folded edge is pressed hard, make the second fold to the initial middle crease.
STEP 3: Finish dividing the bill into one sixth
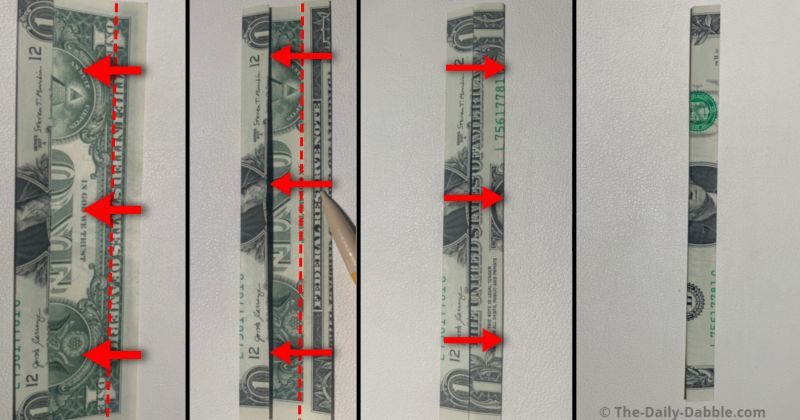
Repeat the same type of fold on the upper half as done in the previous step.
Make the first fold to the middle letters “IN GOD WE TRUST” and the next to the center.
The last fold is just flipping it over into one-sixth using the middle crease.
STEP 4: Start forming the letter
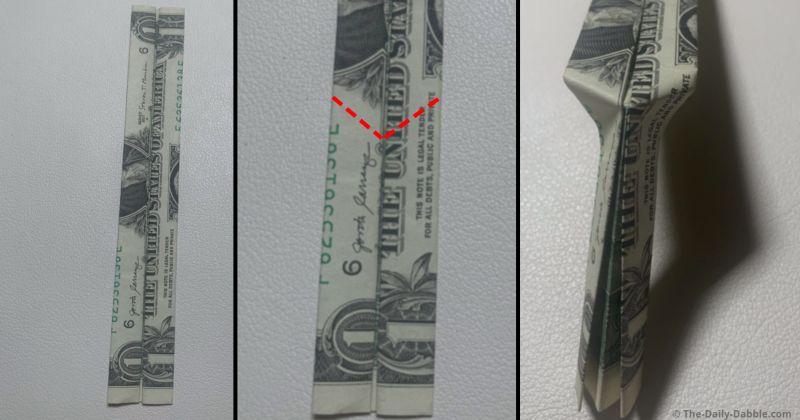
Unfold the most recent fold as we will start shaping the letter with the bill in one-third.
Make two creases by holding the right side of the bill and pinching the other together.
Try to make the creases where they are marked in the picture.
STEP 5: Repeat this process on the other side
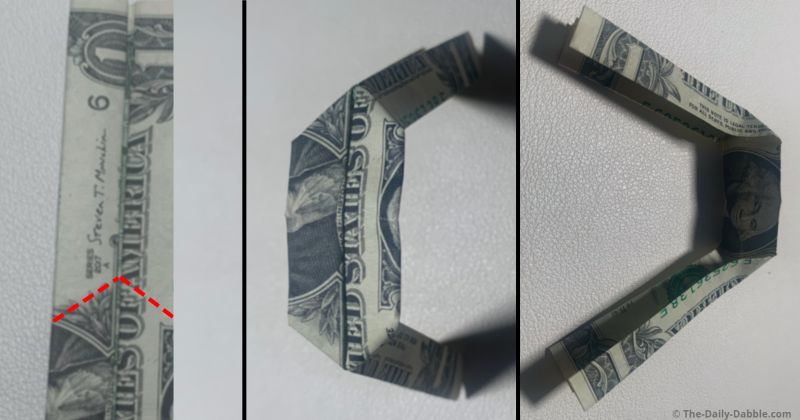
Using the same process, make two more creases to evenly mirror the other side.
Pinch and push inward a bit to make the diagonal creases as seen in the picture.
STEP 6: Flatten the middle section
Bring the flat center portions to meet the longer sections on each side.
Doing this should make everything nice and symmetrical for now.
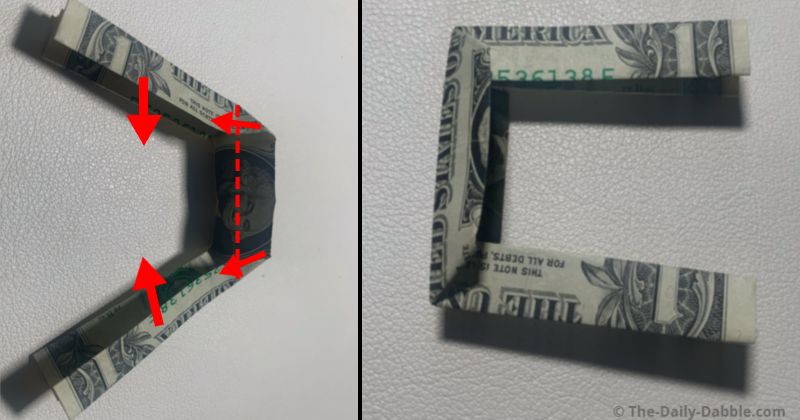
STEP 7: Push inward to form slanted creases
Push and in on the upper right tip to form the creases where shown.
Next, flatten it down to make it as straight as possible.
STEP 8: Repeat this step on the lower part
Hold the left side and push up and in on the bottom right middle to form creases.
Flatten it out like above and be sure to rub all folded edges to keep everything down.
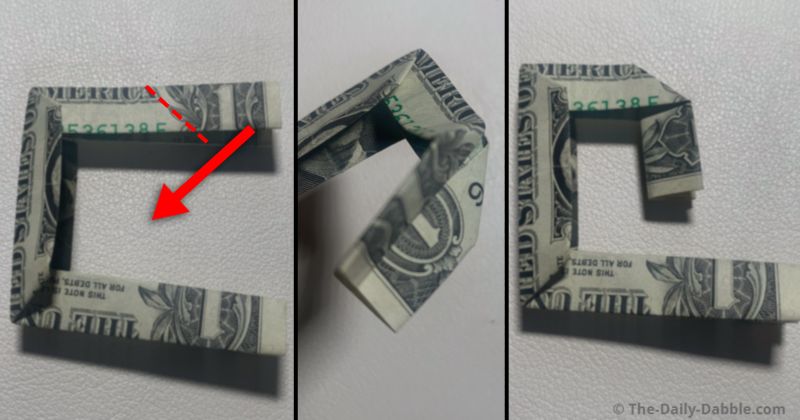
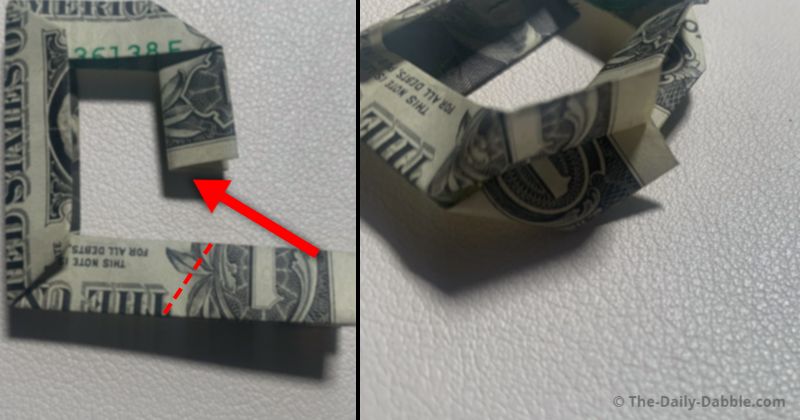
STEP 9: Finish connecting the letter
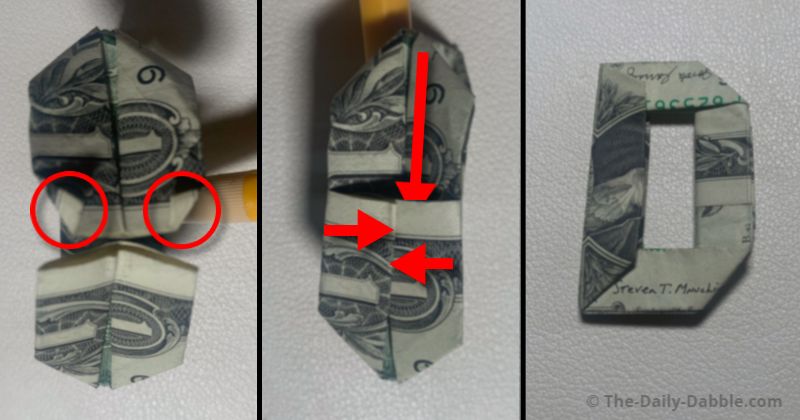
Flatten the tips momentarily and fold the tips over on one of them.
Slide the folded side into the other and then close it back together.
At this point, you can make straightening adjustments where they are needed.
That’s how to fold the letter D from a dollar bill!
PREVIOUS: Dollar Bill Origami Letter C