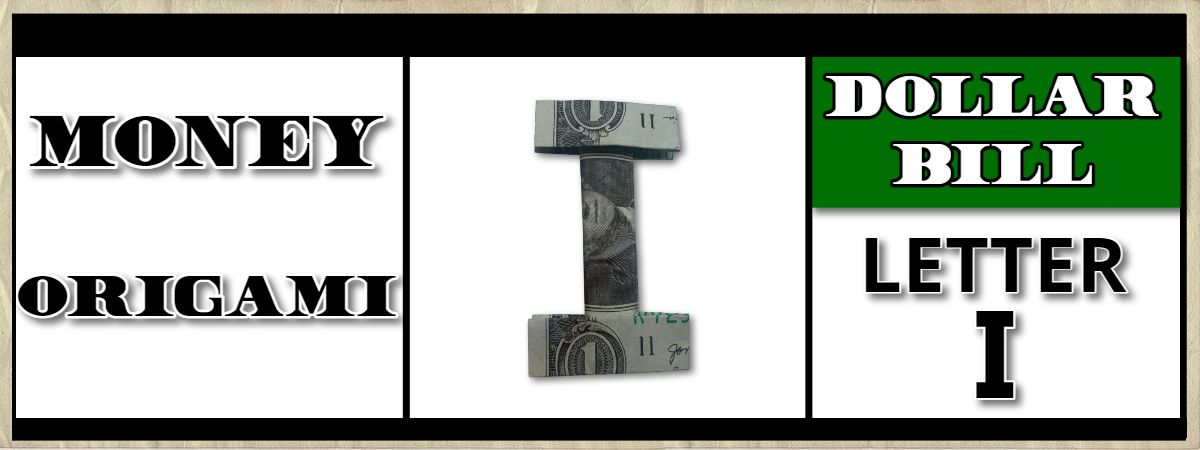
Learn how to make dollar bill origami folding guide for the letter I.
You can spell a special message or name for a gift with these money letter folding tutorials.
The letter I is really easy to make and should only take a few minutes.
Let’s get started!
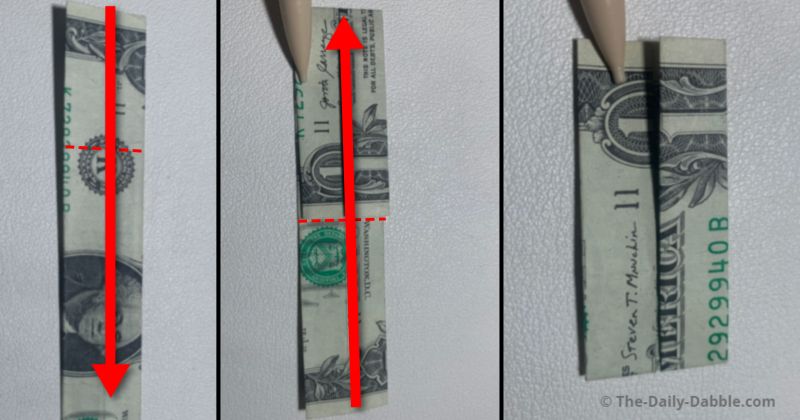
STEP 1: Fold the bill in half lengthwise
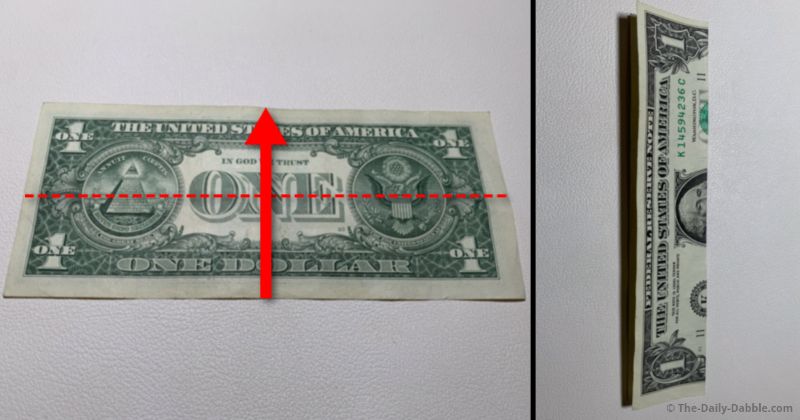
Starting on the back of the bill, fold it in half lengthwise.
Rub the edge well to make a crease and then unfold it.
Be sure to make rub the crease of each step in this tutorial to help keep it flat.
STEP 2: Fold the bottom twice to the center
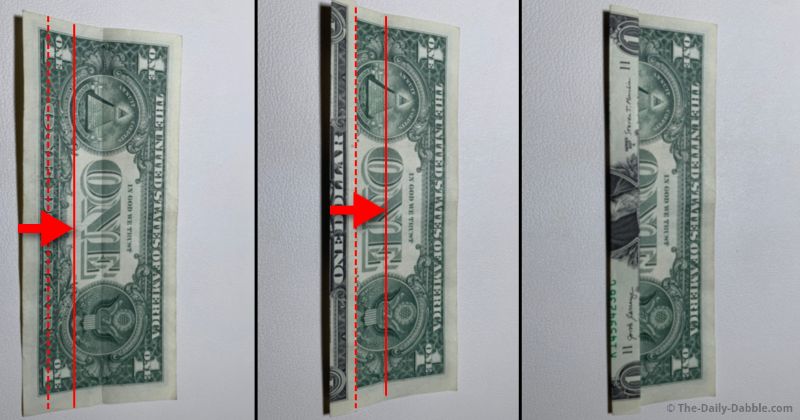
Divide the lower half into thirds by making two folds to the center crease.
Use the picture for help to know where to make the first fold.
The second fold will go to the center line made in step 1.
STEP 3: Repeat the process on the upper half
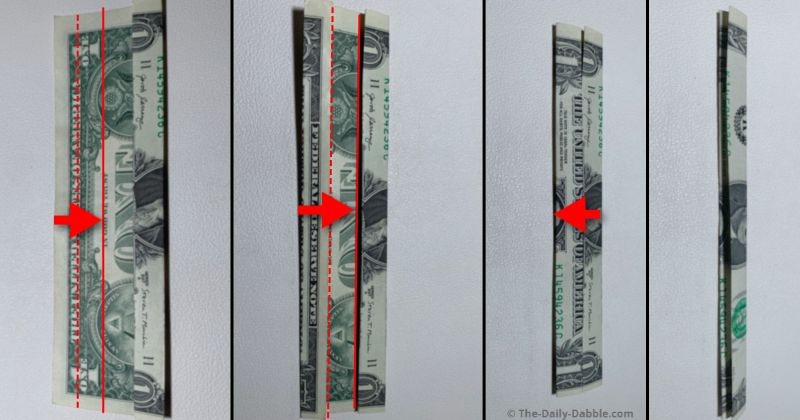
Make another two folds to get the bill into one-sixth.
The first fold goes to just over the words “IN GOD WE TRUST.”
The second fold will be made to the center crease.
Lastly, fold the bill over into one skinny piece.
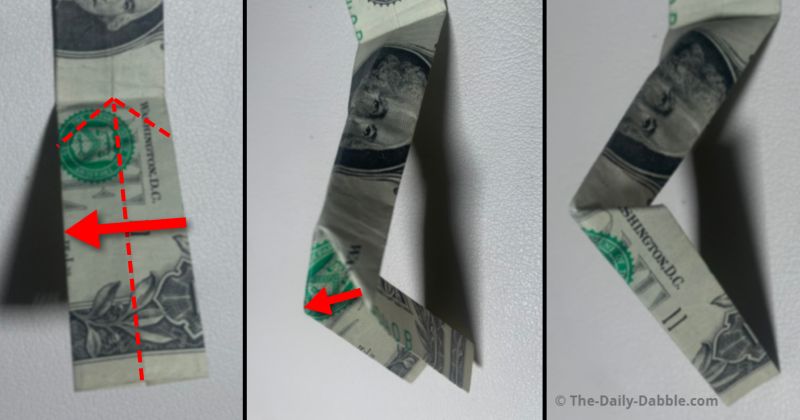
STEP 4: Fold the bill over into a third
Start by opening the previous fold from the last step to the side with George Washington’s face.
Fold the left side over to make a crease where shown in the first picture.
Next, fold the right side over evenly to the left edge.
Rub the edges of each fold and open these last two folds for the next step.
STEP 5: Make two slanted creases on the right side
Hold the middle and press in on the right side to make the two creases where shown.
Bring the newly made flaps together and then back over the bill to the center as seen in the last picture.
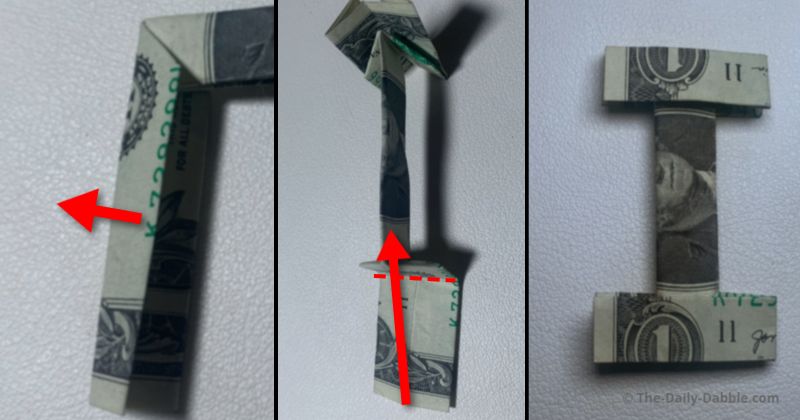
STEP 6: Form one side of the letter
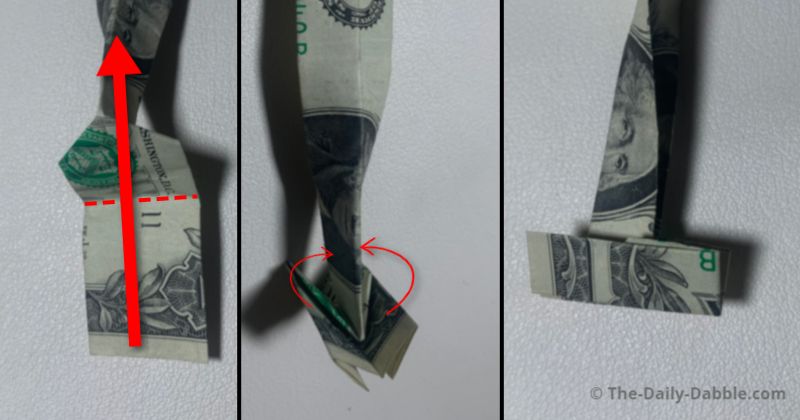
Open up the folded end until it’s flat and then fold it over towards the center.
Make the crease as shown and then close it up to form one side of the letter I.
STEP 7: Start making the other side
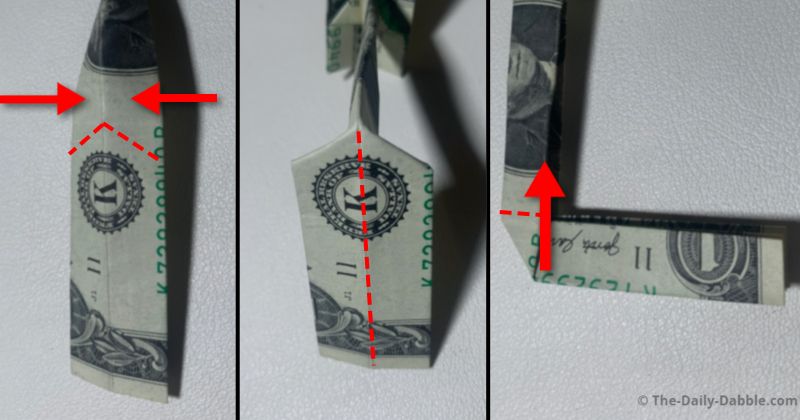
We will repeat the same process as steps 4-6 on the opposite side.
Make two slanted creases by holding the end and pinching the center in.
Push in on the end to form the crease and then close it over like step 5.
STEP 8: Finish shaping the letter I
Open up the end just like in step 6 and fold it over towards the center.
Fold both flaps in towards the center to flatten the letter.
Straighten and even the letter as needed at this point.
Now you know how to fold a money origami letter I!
PREVIOUS: Dollar Bill Origami Letter H
NEXT: Dollar Bill Origami Letter J
ALL: Money Origami Alphabet Letters
Happy Folding!