
In this guide, I’ll walk you through how to fold a traditional origami crane step by step.
While the crane has more steps than most beginner folds, it is rather easy to accomplish.
Your first couple of cranes might take 10-12 minutes each; however, after you get the process down, you can easily fold these remarkable little birds within 3-5 minutes!
Origami Crane Meaning
The art of origami has been around since the 6th century, and of the thousands of designs known today, the Japanese origami crane is among the most popular.
So what exactly does it mean when someone gives you an origami crane?
The symbolism behind the origami crane can mean a variety of things including, peace, good health, success, and good fortune.
But among these, the origami crane primarily symbolizes luck.
It is said if you fold 1000 origami cranes, you are granted a wish (similar to wishing upon a shooting star) or eternal luck.
However, folding 1000 paper cranes is no easy task. Once you get the process down, each paper crane takes about three minutes to fold. If you do the math, that’s 3000 minutes or 50 hours to fold 1000 cranes!
Let’s get folding!
To make a paper crane, you will need a single square piece of paper. You can use regular printer paper cut into a square; however, I recommend origami paper for the best-looking crane.
In this tutorial, I’ll be using a multi-color sheet of origami paper, but you can use single-colored paper as well.
Note whichever color is facing up on step one will dictate the color of your crane.
In my example, my paper is blue on one side and white on the other. I want my crane to be blue, so I’ll start with the blue side facing up.
1. Fold the paper in half diagonally, then unfold

We will start by creating the bird base, which can be used to fold a variety of other origami creations.
Fold your paper in half diagonally by bringing the bottom right corner up to the top left corner. Make a good crease and then unfold.
2. Fold the paper in half diagonally in the opposite direction, then unfold

Once again, fold your paper in the other direction diagonally by bringing the bottom left corner up to the top right corner. Make a good crease and then unfold.
3. Flip the paper over and fold it in half vertically, then unfold
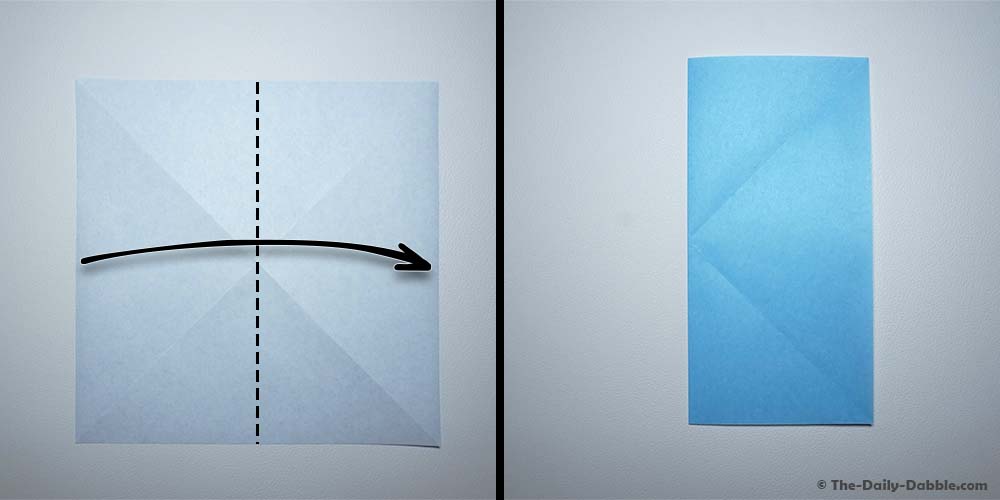
Flip your paper over so the color side is down, and then fold in half vertically, bringing the left side over to the right. Crease and then unfold.
4. Fold in half horizontally, then unfold

This time, fold your paper in half horizontally, bringing the bottom edge up to the top. Once again, crease and then unfold.
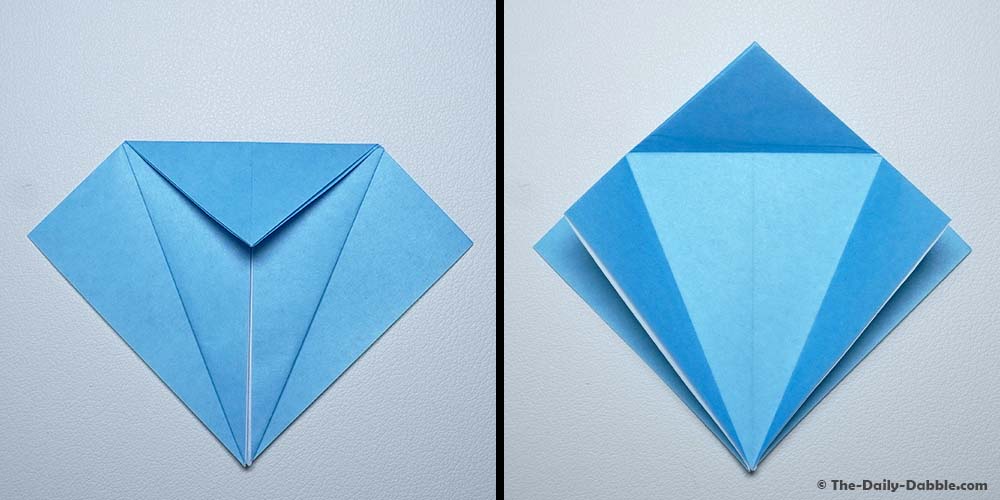
5. Fold all four corners inward
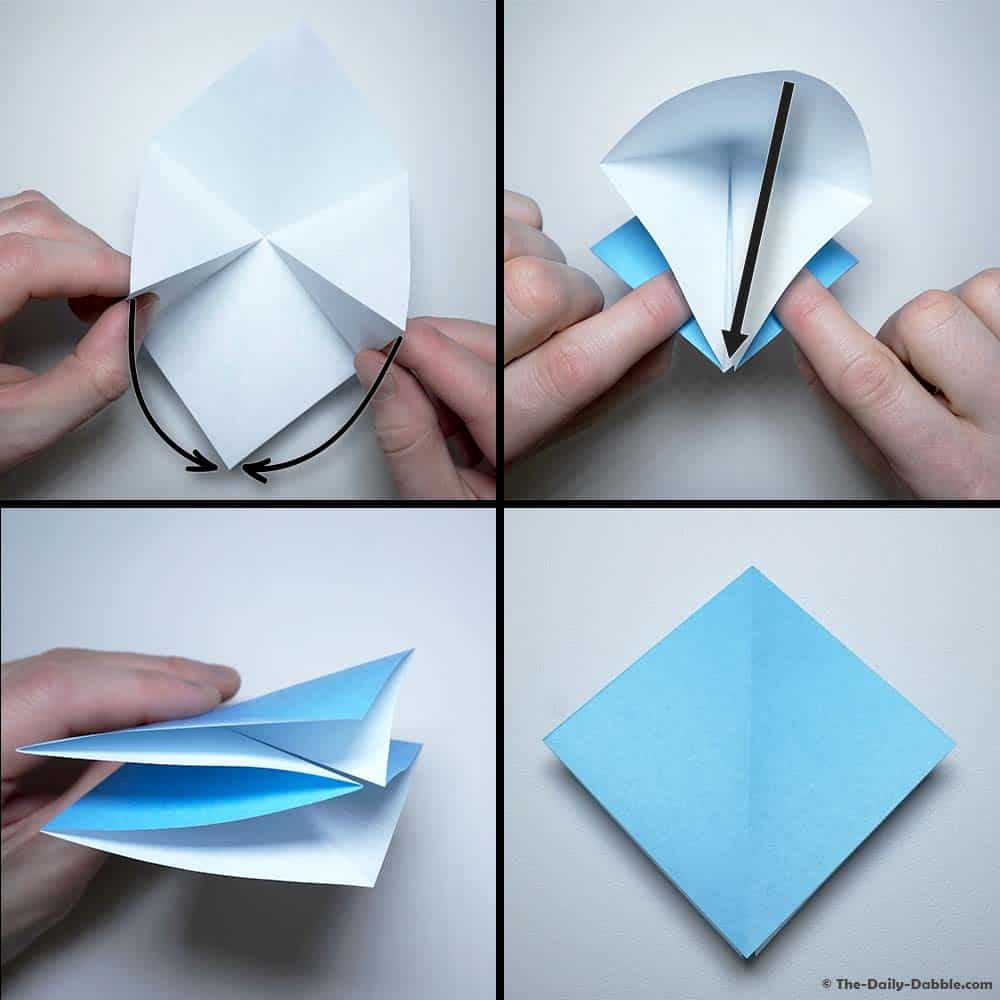
Take all four corners of the paper and fold them into each other, and then squash it flat.
The easiest way to do this is to take the left and right corners and fold them to the bottom corners. Then take the corner and fold it down.
The result will be a smaller square, with a crease running down the center—like seen above. This is called the origami square base and is a starting point for many other origami folds. In a few more folds, we’ll create the bird base.
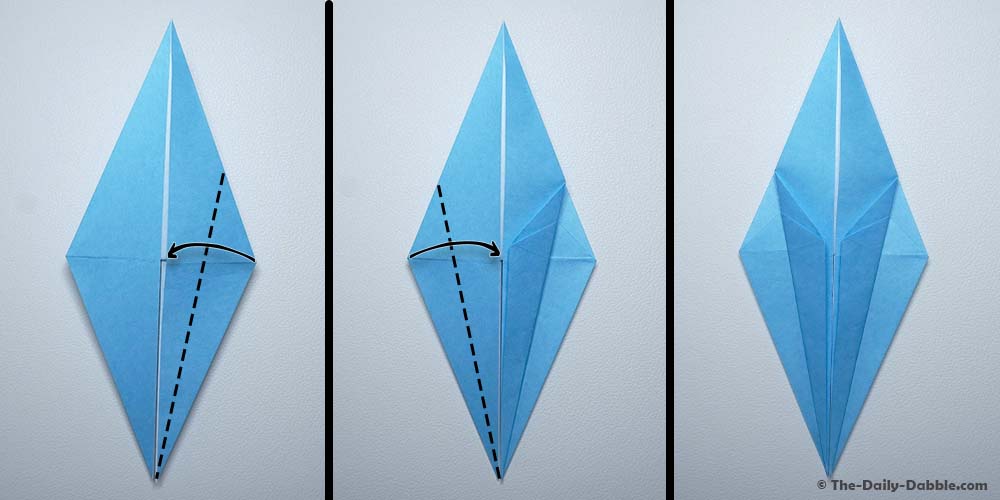
6. Fold the bottom right edge to the center crease
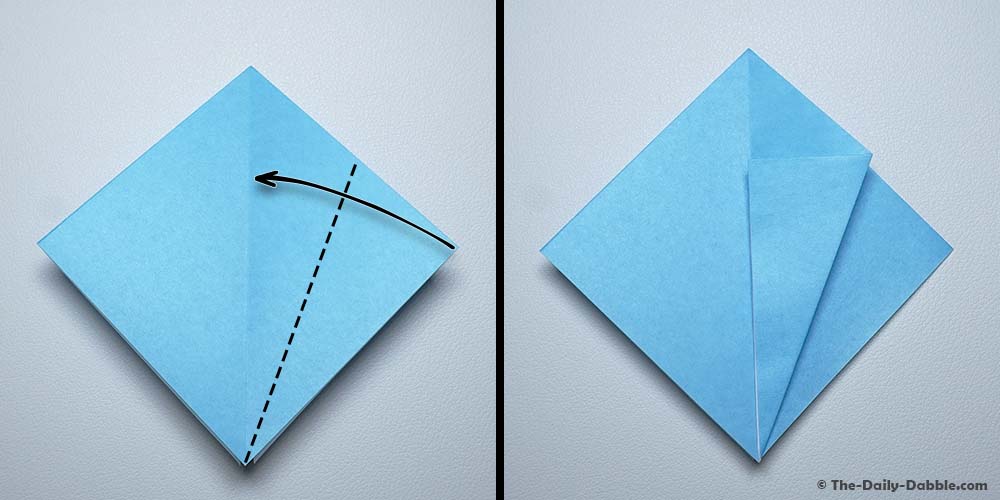
With the flaps pointing downward, fold the bottom right edge to the center line and apply a good crease.
For a nice crisp fold, begin creasing at the small part first.
7. Fold the bottom-left edge to the center crease

Now fold the bottom-left edge to the center line and crease.
8. Fold the top corner down
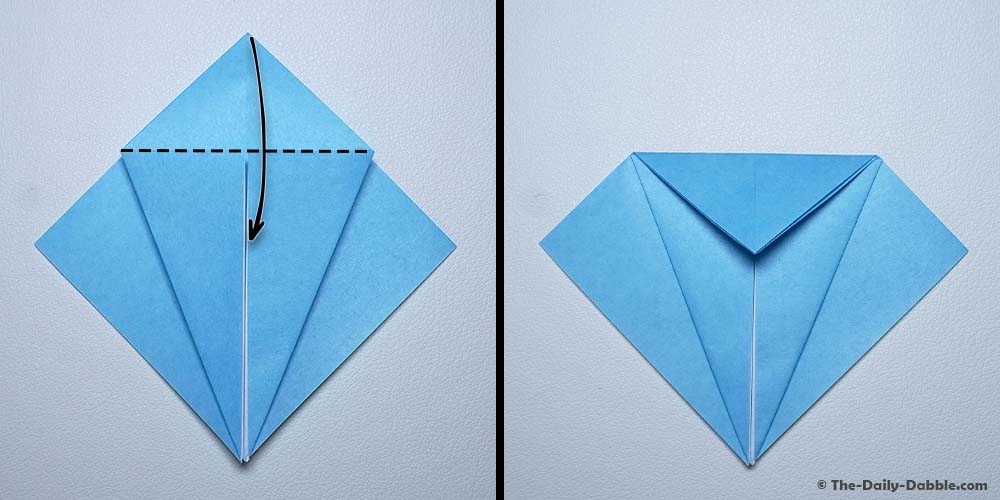
Fold the top section down, covering the previous two folds.
9. Unfold the last three folds
Give all your lines another good crease and then unfold the previous three folds—leaving you once again with a square base.
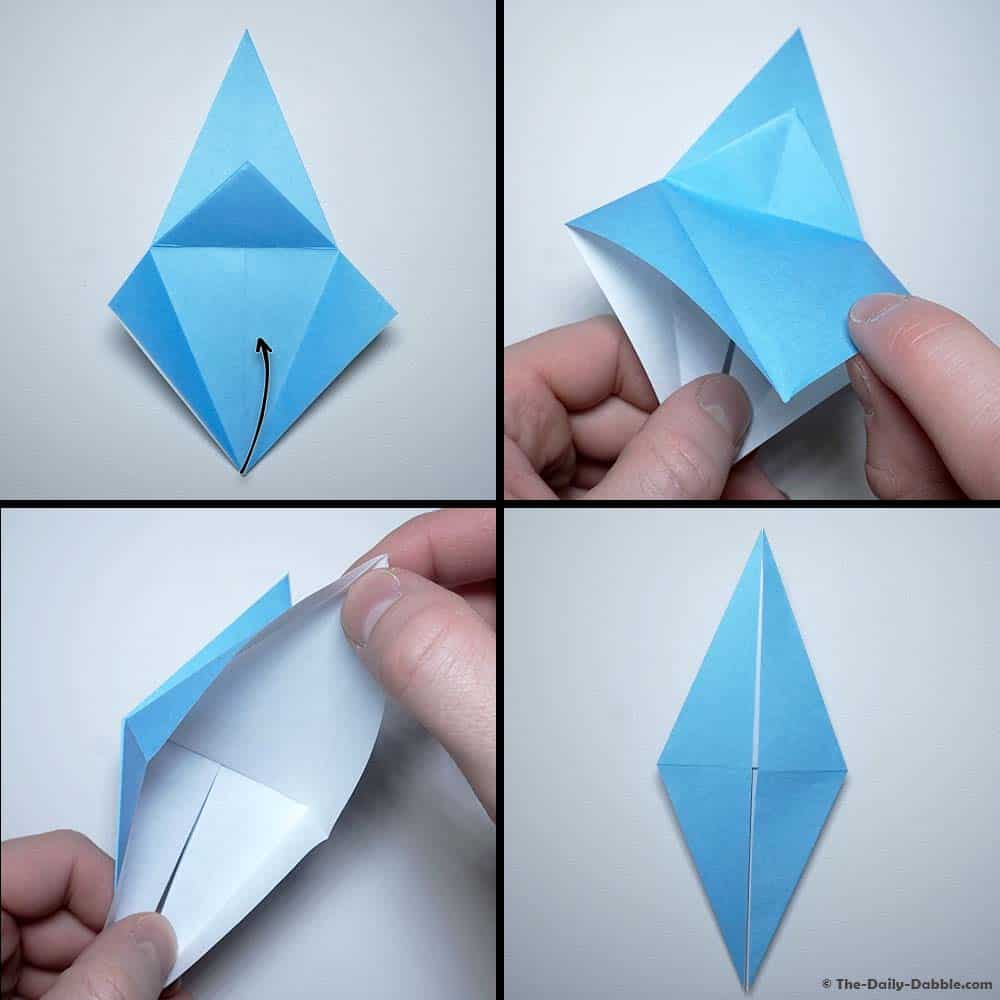
10. Lift the top flap and fold upward
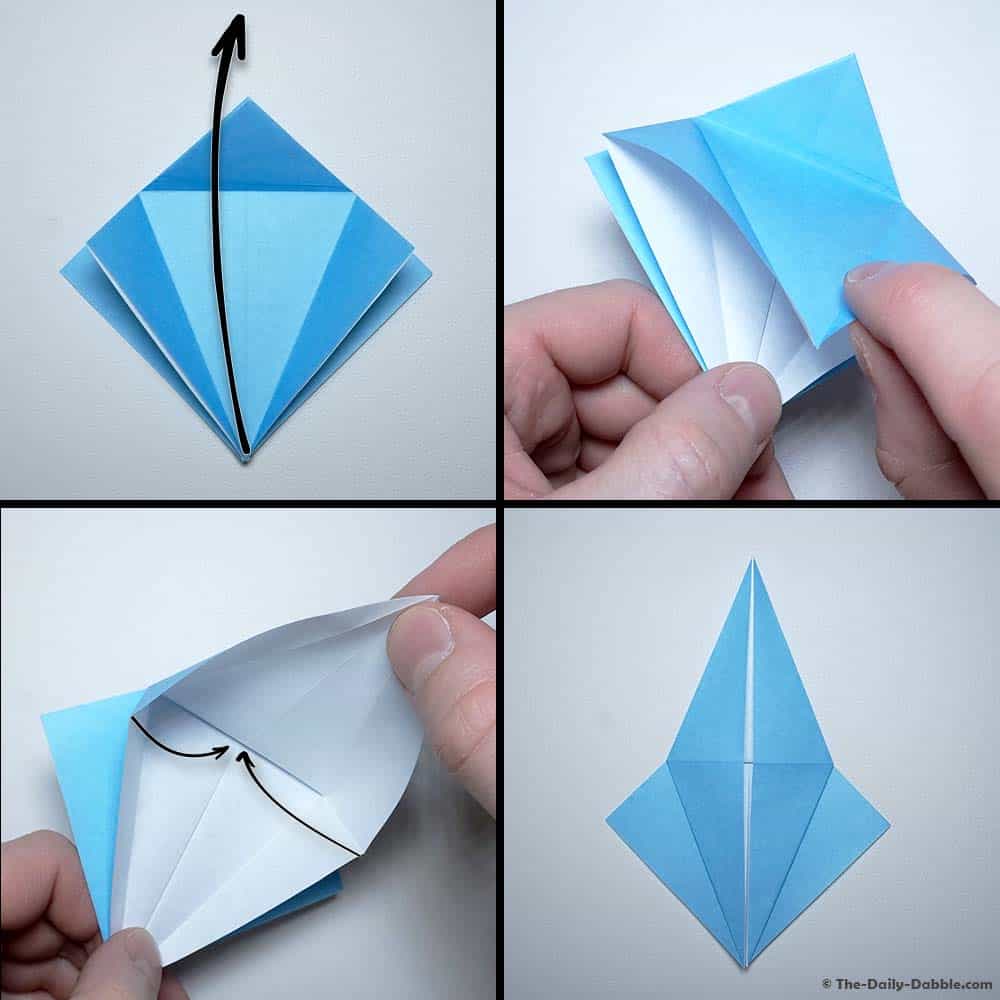
Pull the top flap upward following your creases and squeeze the side edges inward.
You may find it helpful to start at the bottom and reverse squash your crease moving upward.
11. Flip the paper over and repeat
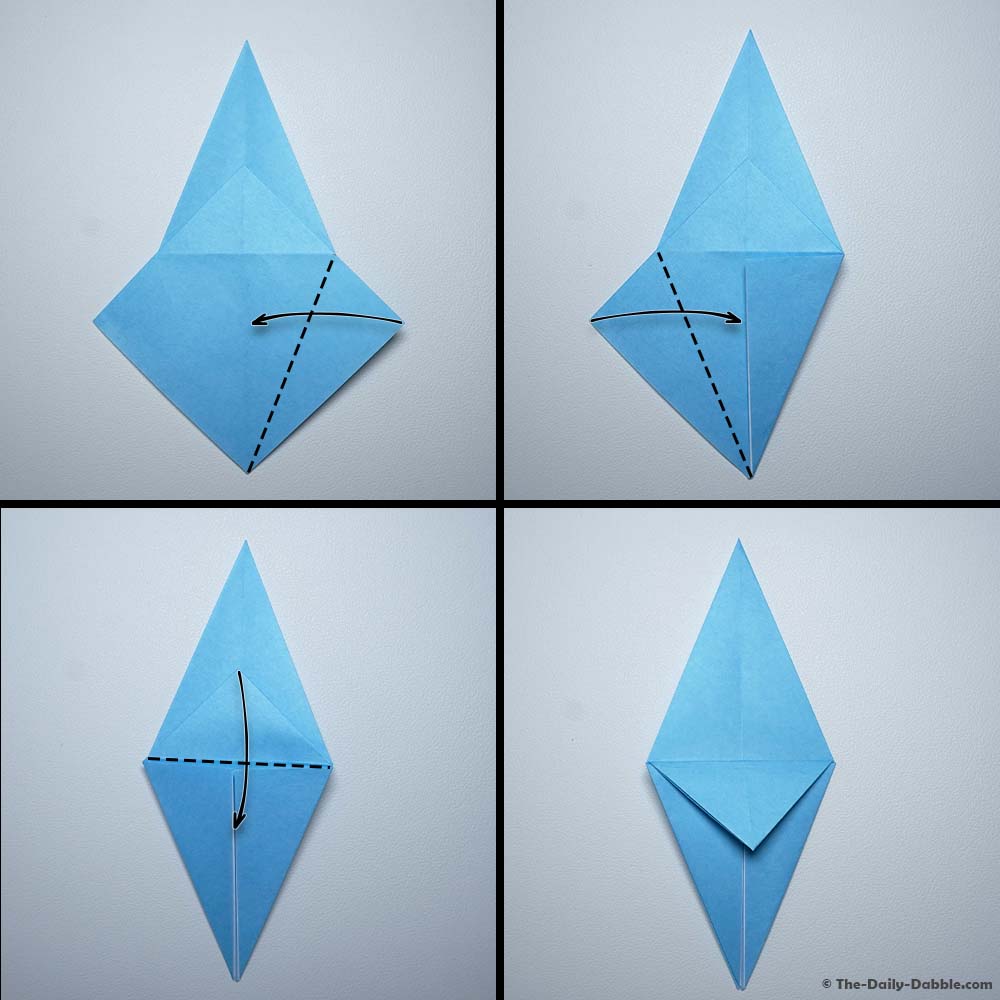
Now we’re going to flip the paper over and repeat the same process to the other side.
Begin by folding the bottom right and left edges to the center crease. Then fold the top corner down, crease, and unfold the previous three folds.
Once more, pull the flap upwards following your creases and squash the side edges inward. The result will be a thin diamond—also referred to as the bird base.
12. Fold the lower edges to the center crease
Now that we have our bird base let’s finish turning it into a crane! This is where things can start getting sloppy, so fold with care!
Fold the bottom right flap to the center line and crease well. Then do the same with the bottom left flap.
13. Flip the paper over and repeat
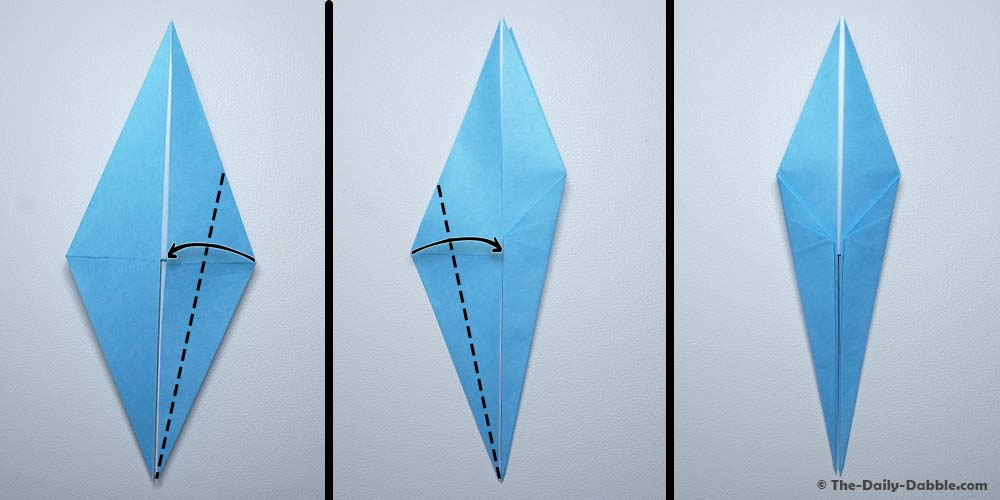
Flip the paper over and repeat the following steps by folding the bottom left and right edges to the center line and crease well.
14. Fold the thin bottom sections upward, then unfold
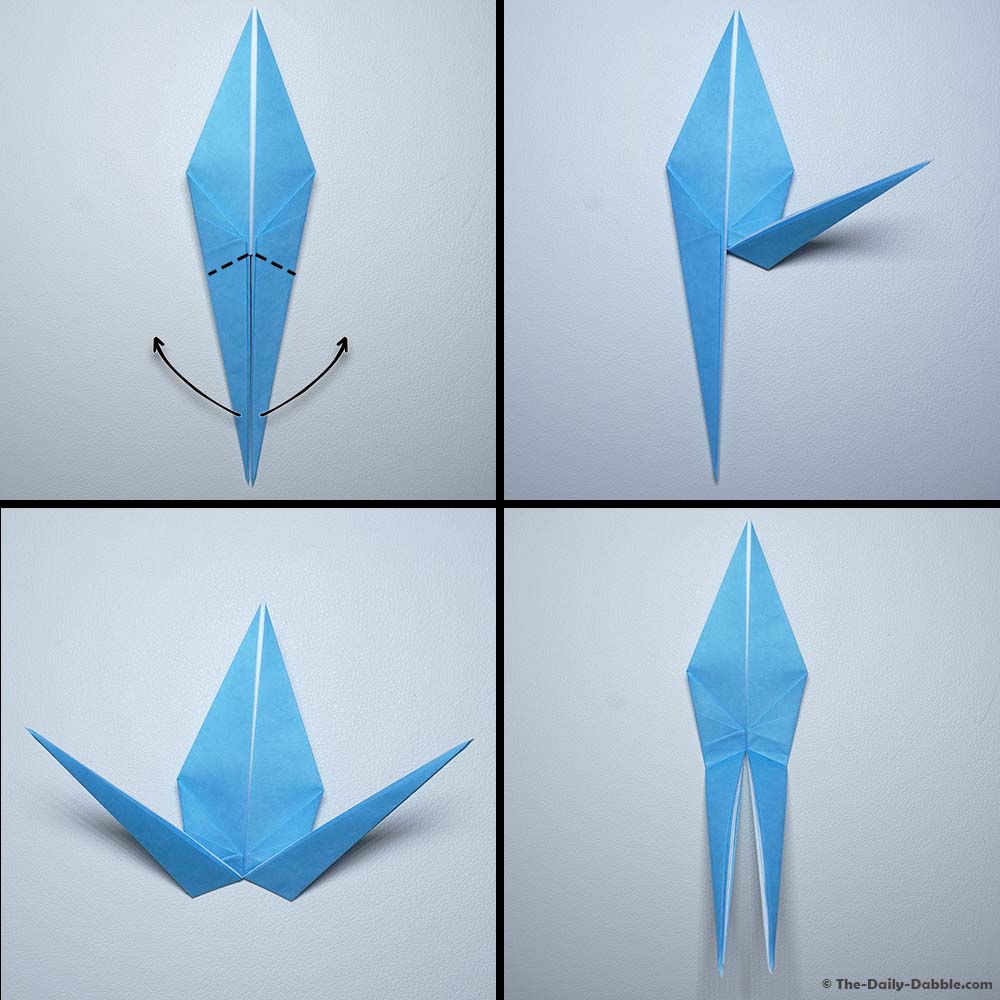
Now we’re going to fold the neck and tail of the crane.
Grab the thin bottom right flap and fold it upward and to the right. Then fold the bottom left flap upward and to the left.
Give both a really good crease and then unfold.
15. Flip over and repeat the following step
Now we need to create the flaps in the other direction.
Flip the paper over and once again fold the bottom flaps upward, following the same creases as before.
Give both a really good crease and then unfold.
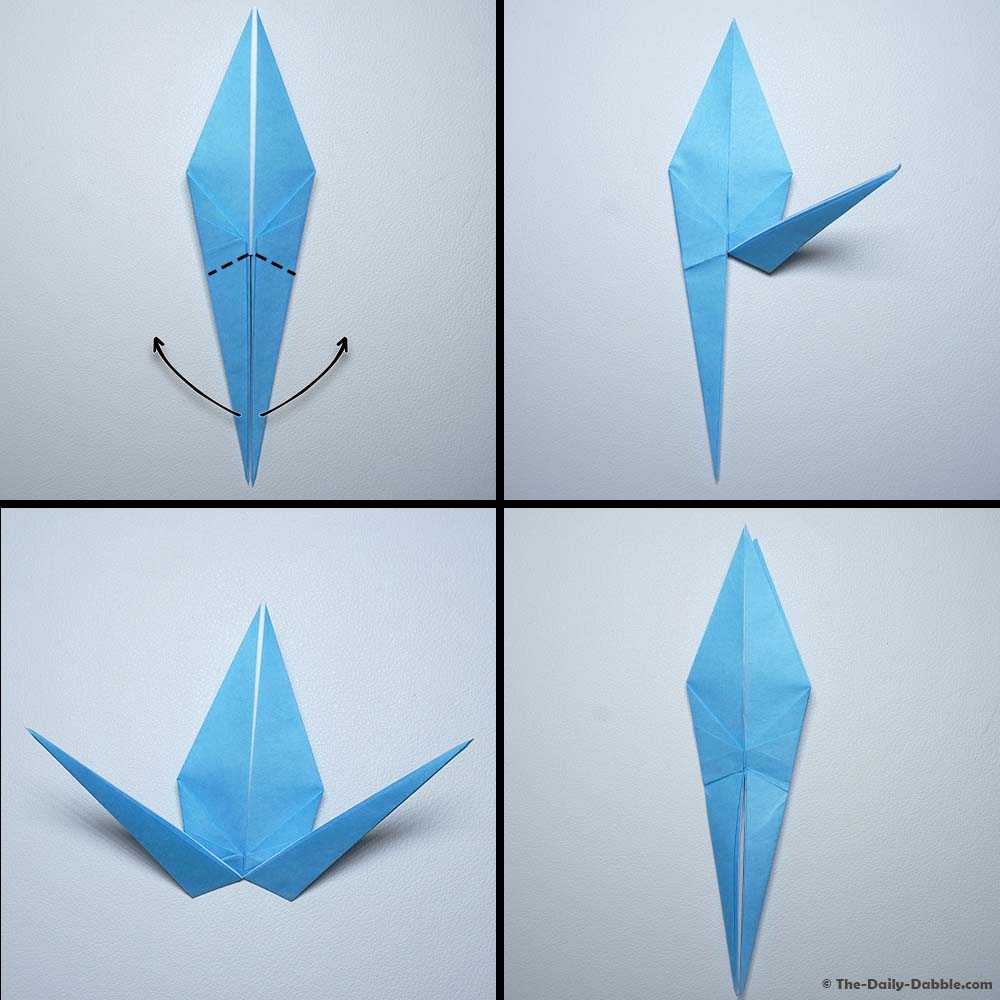
16. Inside reverse fold the right flap

Pinch the left side of the paper and fold the right bottom flap up and inward following the crease you made in the last step.
17. Inside reverse fold the left flap

Repeat the last step on the other side. Pinch the right side of the paper and fold the left bottom flap up and inward, following your crease.
At this point, you can adjust the angle of the crane’s head and tail. The tail in this example will be on the left side, while the head is on the right.
Once you get things where you want them, flatten everything down well.
18. Inside reverse fold the head

Grab the tip of the right flap and fold it down and inside reverse fold it downward to create the head of the crane.
You can make the head bigger or smaller depending on how much your fold down.
19. Fold the first wing down and crease
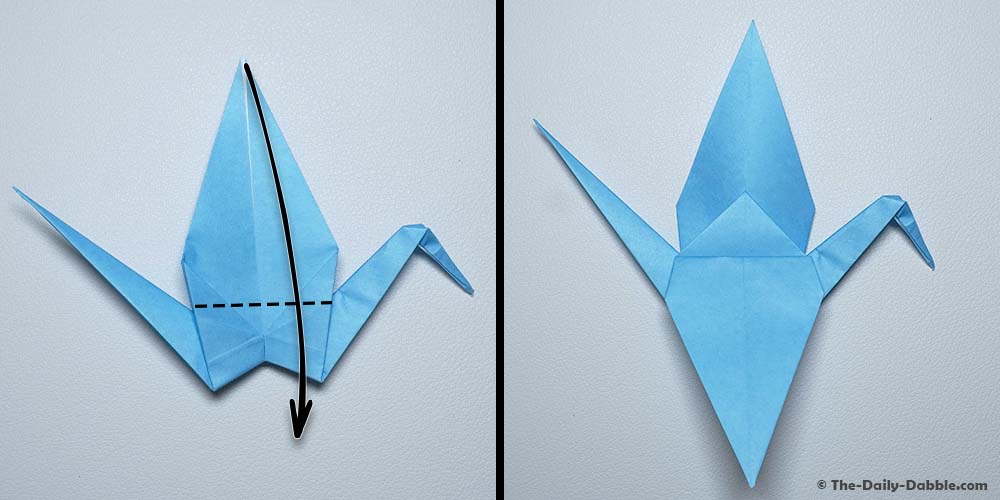
Now it’s time to make the wings! Take the top flap and fold it down and crease.
20. Flip over and fold the second wing down and crease

To finish off the fold, flip your paper over and fold down the second wing.
Give everything good creasing, and there you have it, a traditional Japanese origami crane!
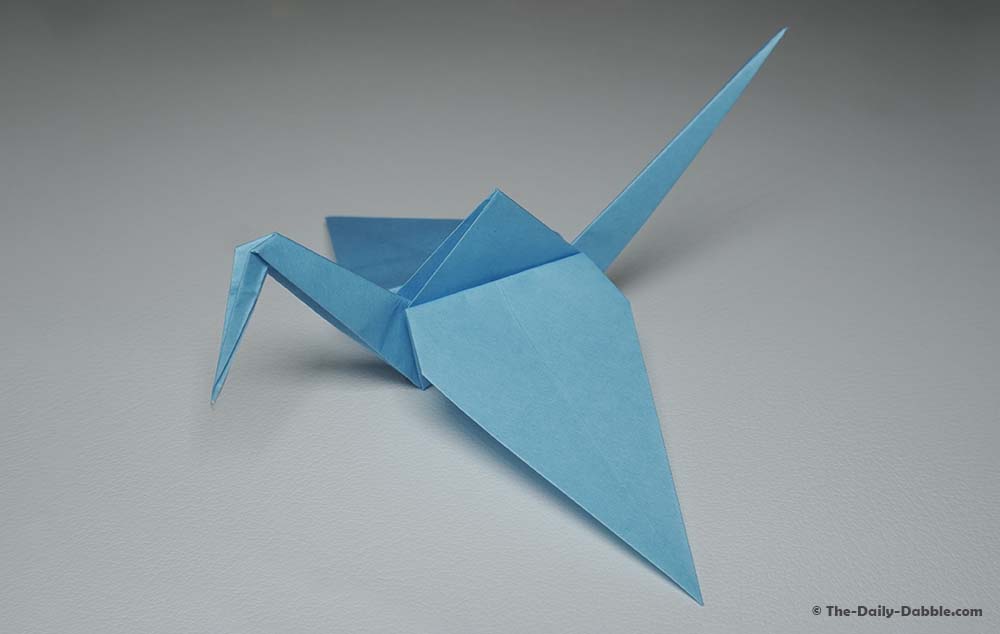
How to open up the Wings (Optional Step)
If you want your crane’s wings to be open, you can open the center triangle by pulling out the wings and pushing the center in.
It takes a little finesse, but if you want to hang your cranes and want them to look like they are flying, it’s well worth the effort.
Just be careful on this step as you can easily rip your paper crane.
Closing Thoughts
You only have to fold 999 more if you want eternal good luck!
If you liked this fold, you might also like the origami butterfly. It’s slightly easier and just as beautiful and elegant.
I hope you found this guide useful and if you would like similar step-by-step tutorials, consider checking out our growing origami archive here.
Thanks for reading, and happy folding!