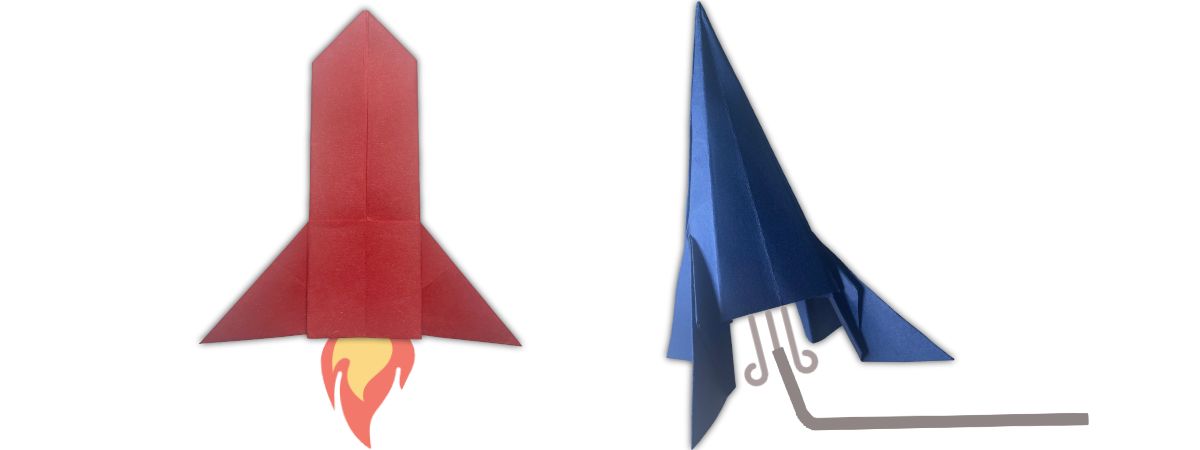
Learn how to quickly fold 2 origami rockets that can be made in just a few minutes with the following folding tutorials
Both of these designs are easy but we will start first with a basic rocket and then move on to a launchable paper rocket.
These are just two of our many easy origami tutorials with directions that are simple to fold and enjoy.
You can also click here to go straight below to the launchable origami rocket.
Let’s get folding!
For these tutorials I used square origami paper, but if you don’t have any, here is how to evenly turn standard letter paper into a square.
Easy Origami Rocket

This is a classic easy origami rocket that can be made in just 10 simple steps.
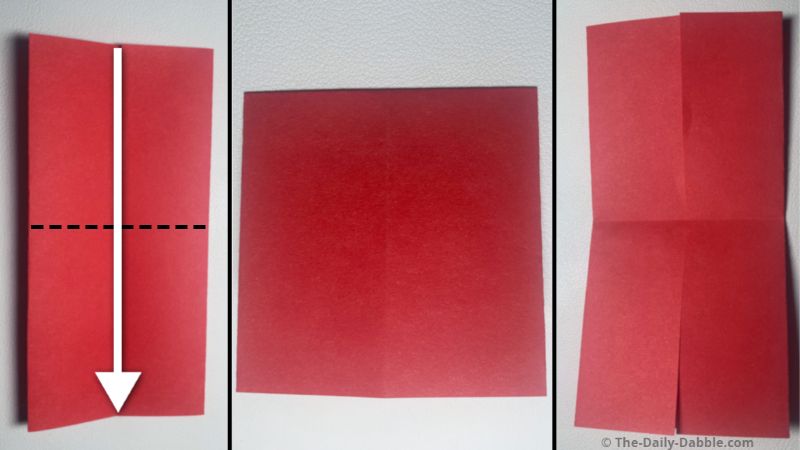
1. Fold the paper in half

Start by folding the paper in half to make a center crease.
Once this crease is made, unfold the paper.
2. Fold both sides to the center crease

Bring both the left and right edges to meet at the vertical crease line.
Remember to press the edges of the folds well to keep them flat and even.
3. Fold the whole thing in half from top to bottom
Fold it in half from top to bottom to from another crease.
Once the fold is made, unfold it for the next step.
4. Fold the top to the new crease
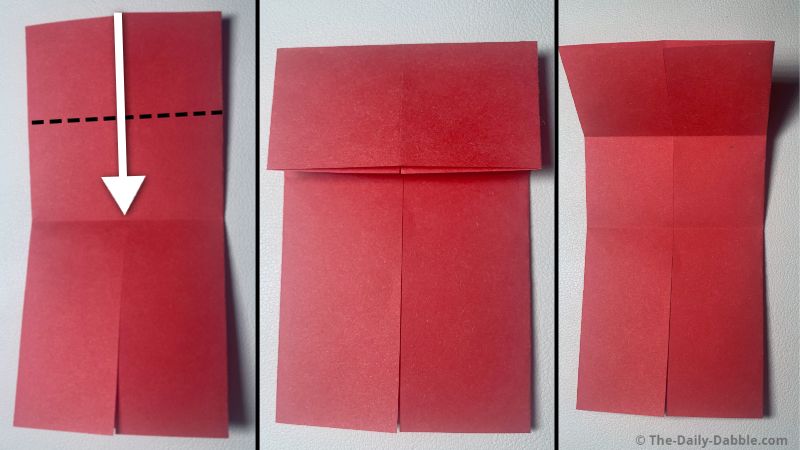
Fold the top to the new middle crease and press the folded edge well.
Once again, unfold this once you have made it.
5. Fold the left edge to the center crease
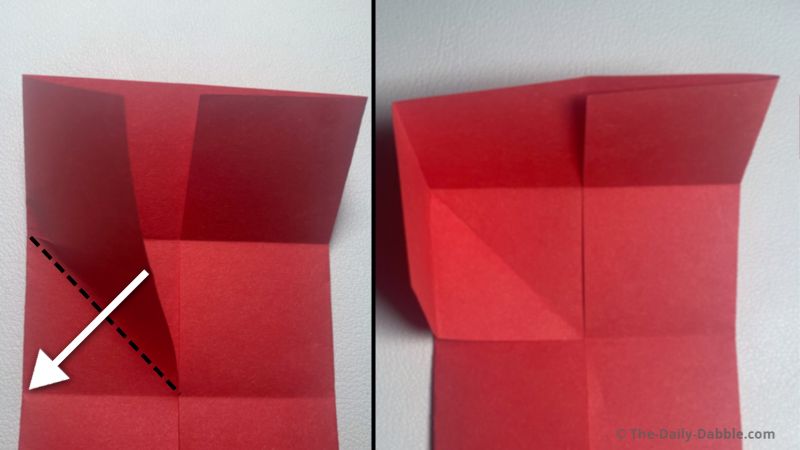
Take the middle edge of the left flap to meet the middle crease.
This will form an even squared edge at the top left.
6. Repeat this on the right flap
This time fold the right edge the same way.
This will make the whole top section into a standing half square.
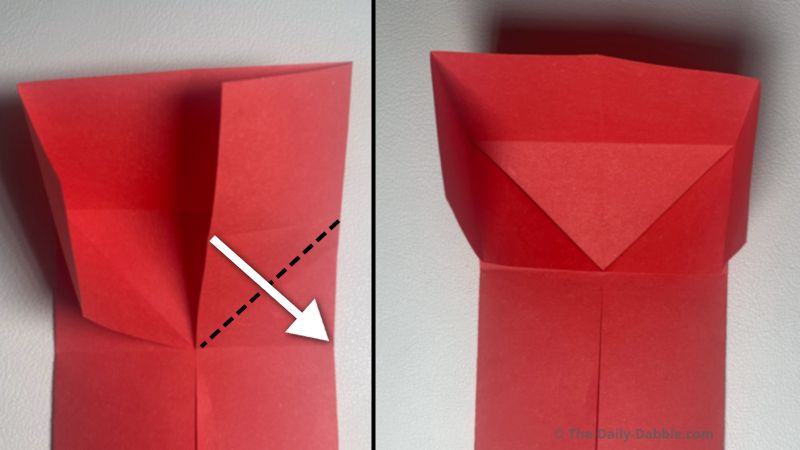
7. Flatten the top squared edges evenly down
Squash fold the upper section down so the edges meet evenly all the way across.
Flip the paper completely over once the edges are pressed well.
8. Fold the square tips to the middle line
Fold both of the squared tips evenly to the vertical crease as shown.
Remember to press the folds firmly.
9. Make two folds on the lower half
Start by folding the flat edge of the lower half to the center all the across.
Next, fold the triangular tip diagonally left and down.
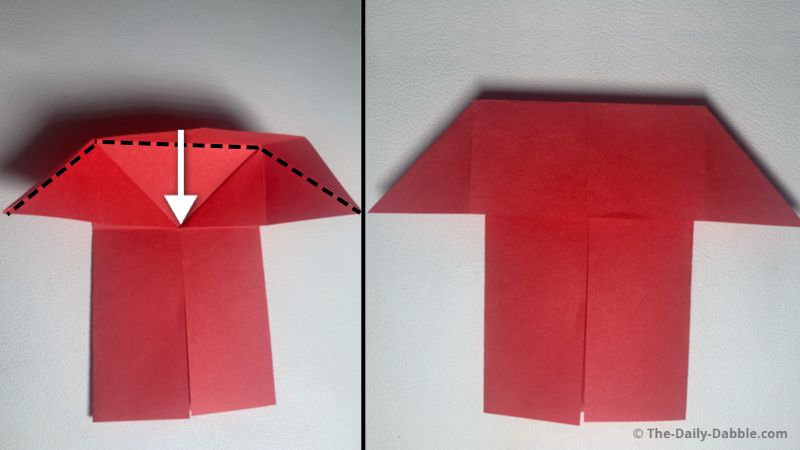
10. Mirror those folds on the upper half
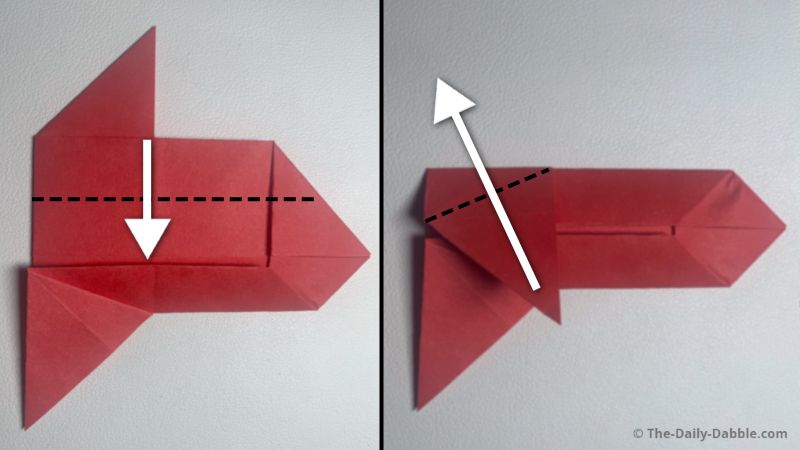
Fold the upper flap down to meet the edge of the other in the middle.
Bring the last triangular tip diagonally up to evenly match the lower one.
Now you know how to fold the easy origami rocket!

Launchable Origami Rocket
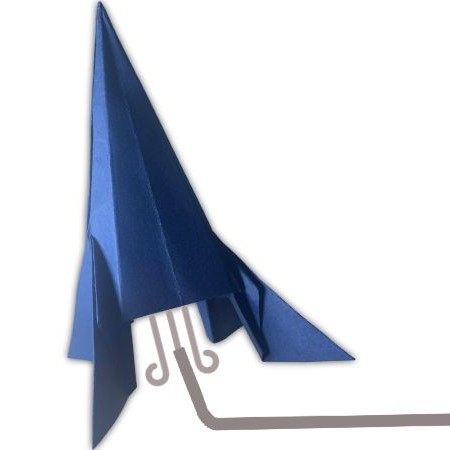
This is an awesome origami paper rocket that can be launched by blowing into a straw placed under the rocket. This a fun and simple project that kids love!
1. Fold the paper diagonally in half both ways
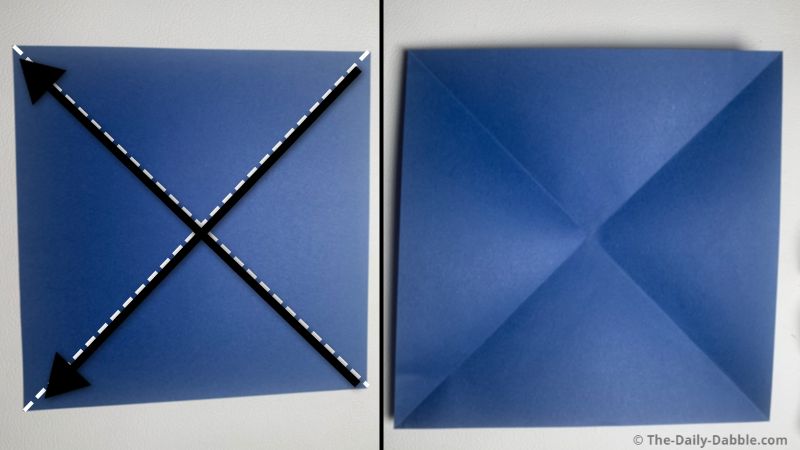
Match the top left and bottom right corners to fold the paper in half and then unfold it.
Repeat the process with the other corners to form the crossing creases.
Flip the paper over before moving on to the next step.
2. Fold the paper in half two more times

This time fold the paper in half from the flat edges.
Fold it from right to left, unfold it, and repeat from bottom to top.
Unfold the paper once you have made these two additional creases.
3. Flatten the paper into a triangle
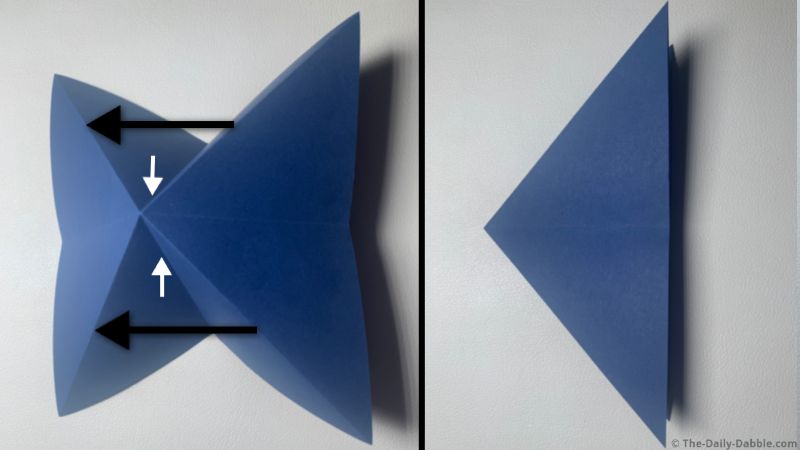
Pinch the middle vertical crease in and then push the paper together to form the triangle.
What you have now is called the waterbomb base!
4. Bring the outer edges to the middle crease
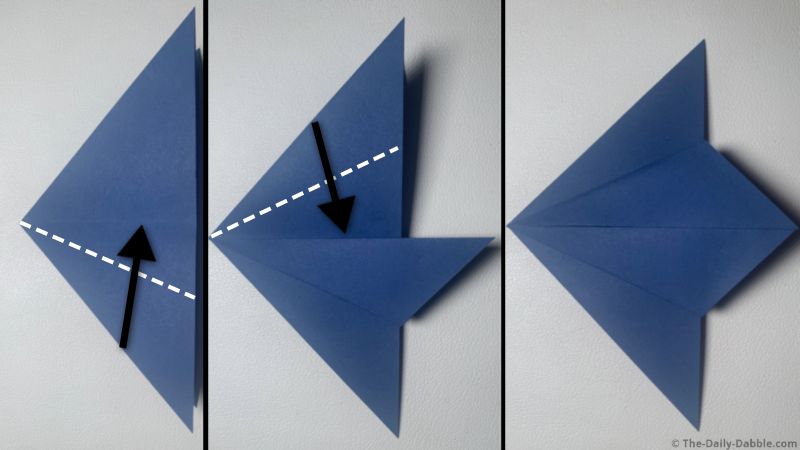
Fold the left edge to the visible center crease evenly.
Next, match the right side to it with the same type of fold.
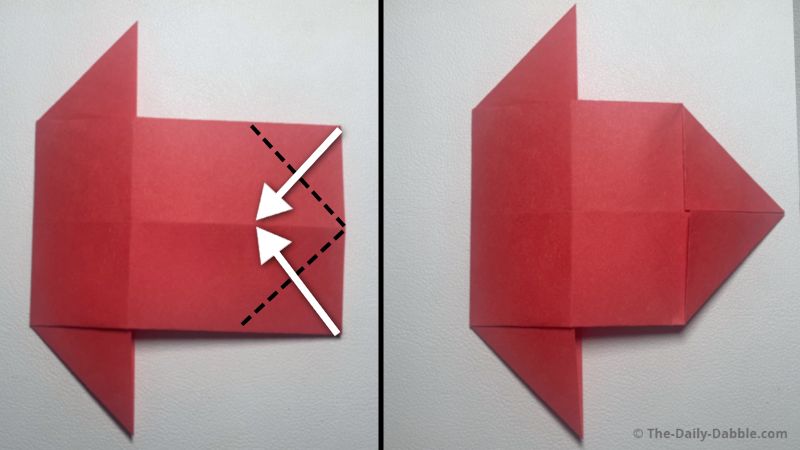
5. Fold both edges to the middle line again

Bring the edge of the flaps you just folded evenly to the center again.
Press the edges of each fold to keep them flat and even.
6. Form two legs of the rocket
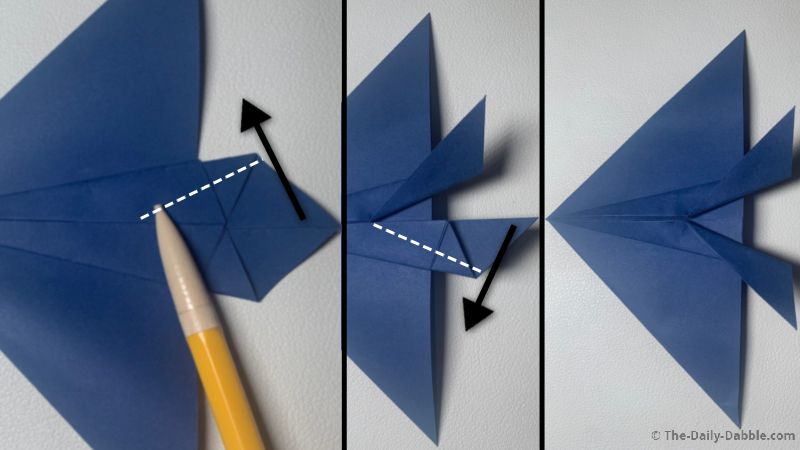
Make two diagonal folds one at a time to form the first two legs of the rocket.
Both of these folds take the middle of the bottom edges outward.
They don’t have to be perfect as you will be able to adjust them later if needed.
7. Start repeating the previous steps on the other side
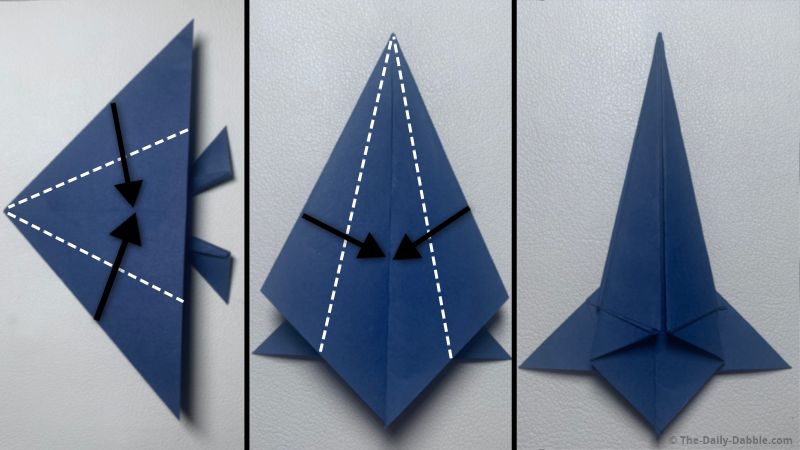
Once you have flipped to the opposite unfolded side, repeat the folds from steps 4 & 5.
Bring both of the outer edges to meet at the center crease twice.
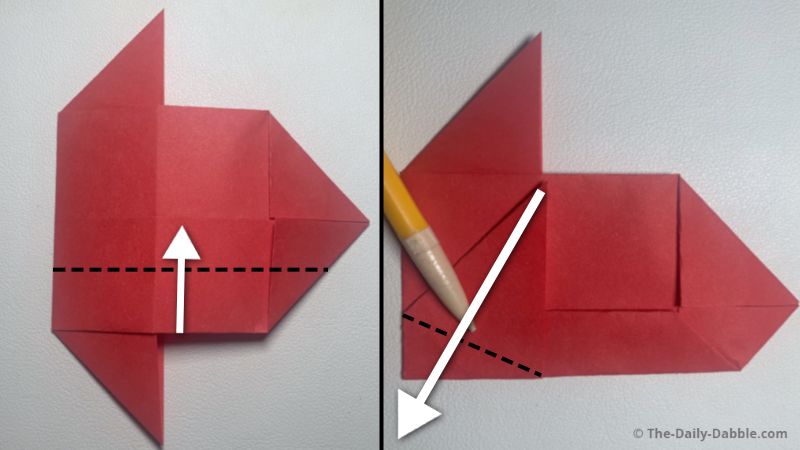
8. Form the last two rocket legs
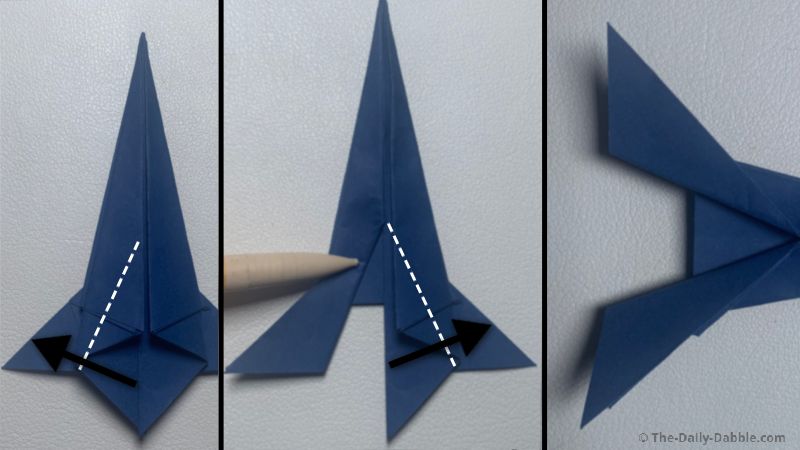
Make two more diagonal folds on the middle of the lower tips.
This time it will be easier as you can just match them evenly to the ones you already made.
9. Open the inside of the rocket
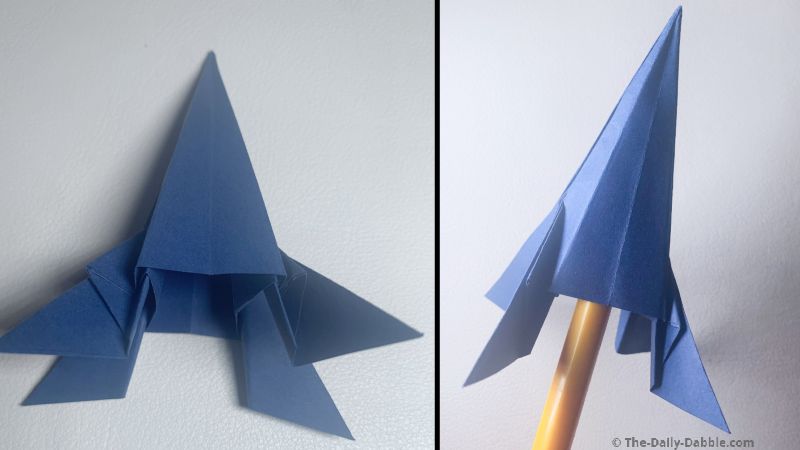
Open the middle of the rocket with your fingers or a pencil. Adjust and even the legs as needed.
To launch the rocket, stand it on a flat surface and place the curled end of a straw under and into the center.
Then you just blow into the long end for takeoff! Now you know how to make a launching paper rocket!
If you want to fold another flying design check out our origami jet plane tutorial!
Happy Folding!